Showing posts with label how to. Show all posts

Tuesday, January 13, 2015

Happy New Year! 2014's Top Ten!


Okay, well, I'm only slightly behind.
I mean, January's not quite half over yet, right?

It has been super crazy nuts around here the last few weeks.
So, without further ado,
allow me to present to you the top 10 from 2014!!!

I know, I know...
you're thinking...didn't I only post ten times last year?
No...I actually did a few more than that!
:)


As always, I feel these numbers would be totally
different if posted at different times of the year.


9. Taking you into the clouds in my Valentine's "heart-air" balloon.


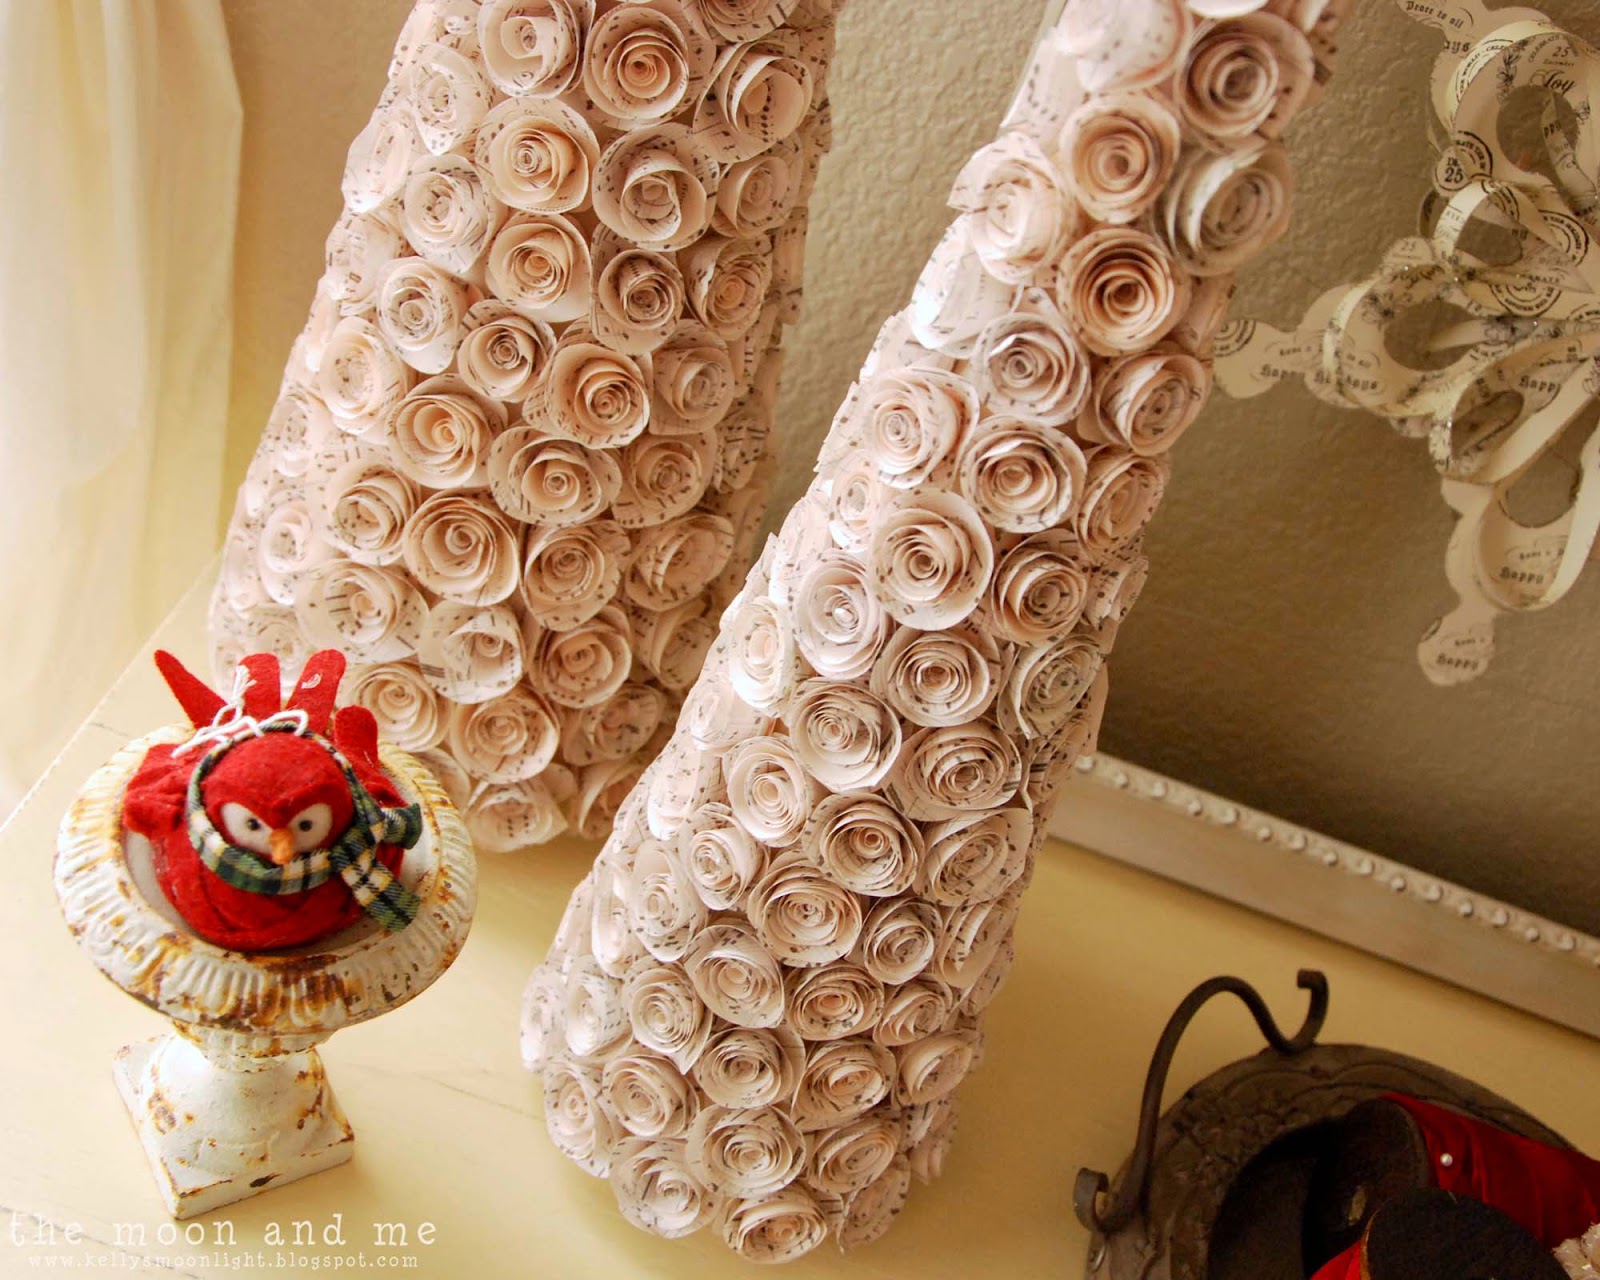
8. Absolutely wonderful and totally time consuming Paper Rose Trees.


7.  The "I still love going in there just to look" Planked wall bathroom.


6. The "keep calm and eat breakfast" Cheesy Egg and Sausage Bake.


5. "I can't believe I ate all the frosting" GF Chocolate Cupcakes with Peanut Butter Frosting.


4. The secret makeover of Sara's purple palace.


3. The Chalk Painted Dresser of my dreams.


2. The great TV Console maker
and the single most popular post from last year...


The super easy customizable DIY personalized cutting board.

And there you have it!
I had lots of fun in 2014 doing all these projects...
I hope you enjoyed them, too!

2015 looks to be challenging for my blogging time.
I just changed jobs and have much less free time now...
although I am totally stoked for this new adventure in the new year.

I know I promised a sweet treat before Christmas...
I am hoping to get it out to you in time for Valentine's day.

Until then, keep smiling!


Sharing here:

Craft Dictator
AKA Design
Crafts a la Mode
I Heart Naptime
The 36th Avenue
Reasons to Skip the Housework
I Should Be Mopping The Floor
The Chicken Chick

Wednesday, June 25, 2014

No Reply At All

Are you a Phil Collins fan?
I don't have any albums, but
I think I'd say I am...
He certainly helped fuel my love affair
with Miami Vice back in the day.

I mean...who didn't have heart palpitations when Don Johnson
was walking around with all that sexy stubble and no socks?
Whooo.  Let me wipe the drool off my chin.

But I digress...that was so far off topic I need a map to get back...

Anyway...the bigger question here is:

   
I recently read this post from Chelsey @ Budget Girl
(okay, it wasn't so recently, this post has been sitting in my queue for a looong time)
that made me think about this in a whole new way.
You MIGHT be and there might just
be nothing you can do about it.

Because some of the things Blogger does is goofy.

So...I know I can be really bad about not responding to comments.
I DO really appreciate and love and read every.single.one.

But it feels contrived when I'm responding just to say "thanks" you know?
SO, thank you from the bottom of my heart!
...For being here, for reading my rambling randomness...
for taking the time to share some sweet words.
You're fabulous...just so you know.
Even if I don't respond to your sweetness.

 
However...if you ask me a question about some project or recipe or whatever...
I will do my best to get back to you as soon as I am able.
If you read Chelsey's post above...you'll find that sometimes
Blogger does not want to show me your email
address even if you entered it in your profile.
And if you have a Google+ profile it's no fun either.

I will spend a reasonable amount of time finding a way
to respond to you because I feel if it's important enough
for you to ask, it's important enough for me to answer.

If you ask a question and you don't get a response from me...
I am sorry...you may have to resort to checking
the post for the public reply on your question.
 
 
I know this is a frustrating topic,...
so, I've made you some cupcake cake pops so
we can drown our troubles in chocolate.

This is not huge, earth-shattering news...
but I wanted to address it and attempt to be amusing at the same time.
Shouldn't we always try to be amusing? :)
 
Well I hope you are having a fantastic week...
and if not, keep your chin up...
I'm pulling for you!
 
The bathroom makeover reveal is coming up soon...
I promise!


Wednesday, June 5, 2013

Rockin' {some cute flag shorts} in the USA


Ladies and gentlemen {imagine there's an echo, mmmkay?}...
today we have a very special guest...all the way from Oklahoma City...
home for the summer...my favorite girl, Sara.


She's sharing this patriotic DIY shorts makeover...
please give her a very warm welcome.
~~~


Hello everybody!
This summer my list of crafty DIY things is just about as long as my mom’s.
Since July 4th is coming up soon this seemed like a good place to start.

So… here goes…

Find a favorite pair of shorts that you want to give an American face-lift.
I got mine at a thrift store. J

They can be high-waisted, regular in cut, denim,
white or whatever your heart desires.

The type of shorts don’t matter. 
I think choosing white in color is
easier for the design, but it’s up to you!


I had my mom make me some star stickers 1.5 inches
in diameter that I placed in a pattern on the fabric.

{These were cut on a Silhouette, but you can find star stickers just about anywhere}


Now that you have the shorts (white in this case) you need
a red and a blue color of paint that you like.
I made the mistake of using acrylic paint and hopefully once
I wash them now that the paint has dried they won’t be as stiff.

Paint made specifically for fabric is probably a better choice.
But hey, you use what you got, right?

Pour about 2 tablespoons of each color in separate containers
and add some water, but only enough to dilute the paint.
Perhaps the ratio should be 1.5:1 ; water:paint.

On the right leg I painted the blue with the stars so that the front would
have the same look as an actual flag. The backside however,
if you continue the stars the same on the left leg, you’ll be flipped

I then took a 1 inch foam brush to paint over them and the rest of the right leg.
Seem easy enough right?


Just make sure that you don’t use too much of the liquid around
the stickers or else you’ll have some bleeding where
you don’t want it and there’s extra work involved to fix the stars.


The left leg is easier and only requires frog tape or washi tape
{excuse me, you used my washi tape?}
to make straight lines horizontally across to keep the white stripes.

You decide how thick or thin the stripes turn out.

My warning is the same with this side though.
Don’t soak the fabric right next to the tape to avoid bleeding.
Brush the liquid off and away from the tape.


I would suggest letting one side dry, at least some,
before flipping to paint the other side.

Hang 'em up to dry completely!
~~~

Thanks, Sara!

Now everybody can R.O.C.K in the USA!


Make sure you follow the recommendations on the paint bottle for washing.


I want to see you all rockin' your flag shorts!
Whew...won't those fireworks be goin' off!


So let's have it...send me pics!
I'd love to see your patriotic refashions!

Did you enjoy this post from Sara?
I have a feeling she'll be back this summer.

Have a spectacular weekend!


Rockin' out here:

Saturday, May 11, 2013

How To Build A Chunky Salvage Style Shelf


Or how NOT to build one.

You know how over in my sidebar it says
I like to make stuff up as I go along?
Yeah...well, sometimes that doesn't work out so well for me.

However, in this case it all turned out okay in the end.
Thank heaven.


When I started making changes to the living room I knew
I was going to want something different on the wall by the front door.
Something a little more substantial than the little shelf I already had there.
Something I created with MY OWN HANDS!!! Bwahahaha.

Sorry...I got a little Frankenstein-y there for a minute. :)

Anyway...I began searching for inspiration.
I found a great one here at AKA Design.
So I set off to make my own, slightly smaller version.
And I didn't want to follow their directions.
Because I didn't that's why.

This...is my story.


First I decided how wide and tall I wanted the piece to be.
Then we set about cutting some wood.

I knew I wanted the corners mitered so they'd all be neat,
so I had the hubby help me cut some boards
before he headed out of town for business.

Some of them were too wide for the miter saw and I
DO NOT like to use the table saw alone.


Since I didn't plan to use many nails...I cut some little
pieces to glue into the inner corners for support.

This section on the left...its inner support piece is shorter because the
smaller piece was *supposed* to fit inside the larger piece.

But *someone* didn't measure correctly and thus the
"making things up as I go along" thing really had to come into play.


You'll see later just how I "fixed" this problem.
Which I knew that I knew wouldn't really be a problem
once I put the molding on the front anyway.
Meh.


I glued everything with Gorilla wood glue...because it's awesome.
Truly.

The back of my shelf is open...there is a small 1X3 piece at the top for stability,
but I didn't make the "boxes" you see in the inspiration post.


Here's a back view so you can see the support piece and bottom.


You can see here where I added a couple of those little
support pieces to hold the bottom part to the top part.

Like I said...then it has a piece of small molding on the front...
it's really sturdy, it's not going to fall apart any time soon.
Unless I throw it down the basement stairs,
but really, why would I do that?


Here's what we've got folks:
1 - 1X8 for the top shelf {actually measures 7"}
1 - 1X6 for the top section front and sides
1 - 1X4 for the bottom section front and sides
 1 - 1X3 for the back support
1 - 1X4 for the bottom bottom, you know.
Some upside down baseboard molding, some cove molding,
and some stray pieces of what I believe are
furring strips I found in the corner of the garage. :) 


I only bought 4 foot boards because they were
easier for me to haul around by myself.
Of course, the molding doesn't come in short pieces,
so that's another story.


I filled all the seams with DryDex spackle.
I thought it might help with my impatience.
Nope.

But it sands soooo smooth. :)


One thing I did do the same...used a sample pot of chocolate
brown paint I had hanging around for my base coat.

My other furniture is black, but I didn't want that harsh of a contrast.


Then I wasted some time adding a little grey here and there.
I say wasted because, in the end...I don't think you can even tell it's there.
The whole thing got some Annie Sloan Old White and distressed.

Here's a lesson learned: chalk paint and
old crackle medium do NOT like each other.
Just so you know.
Oh well.


Ignore my unmanicured pinkish hand...and gaze
upon the hooks I had planned on using.


But Jon, in his infinite wisdom, said to me:
You're not gonna like that.

But why? I picked them and I want to use them so there!
Fine, but they're gonna stick out from the wall and you're not gonna like it.

Fine.

SO, since he IS awesome...
he suggested doing keyhole hangers.
He even routered them for me. :)
  

See how he just made a nice little cutout in the wood?
We decided the vertical piece would be stronger for supporting the shelf.


We actually made the whole a little deeper in the middle since
the screws we used were slightly domed and needed a little more space.

Here you see the finished keyhole hanger.
And yes, now it hangs flush against the wall.
Sweet.

{If you look closely, you can see how the cove molding helps
hold the bottom and top pieces together.  See? I wasn't worried.}
  

We used a laser level to make sure we hung it straight...
at this point it's already hung...he's just using the level now so he can gloat. :)


And thar she be!
Oh, it's missing something you say?


Okay...how's this?


Oh, I forgot...I used some Minwax paste wax over the paint.
Love it.


While at first I was mad at myself for messing up the paint with the
crackle goop, it actually kinda added to the salvage look I was going for.

Like something that had been repainted several times on top of old chipped paint.
Perfect.


Now it's home to some fun things, like my number 3 sign, a rooster,
a canvas of one of Sara's senior pics, a plaster mold of her hand when she
was 5, and one of many stars you find sprinkled throughout the house.


Like my number 3?
I got that from Antique Farm House.
Jon says: why 3?
I said: because we're 3.
No, we're 2 now.
NO...we will ALWAYS be 3.
:)


The finished shelf is 30 1/2 inches wide,
about 7 inches deep and 10 1/2 inches tall.


Chunky.
Chunky's good, right?
That's what I tell myself anyway.

Does it speak architectural salvage to you, too?


Sharing piles of sawdust here: