Showing posts with label sweets. Show all posts

Monday, February 2, 2015

Grandma's Butter Caramels

Hello, strangers.

How's your new year going so far?
I hope it's been great...sorry for you east coast folks...
I know the weather has been making life miserable.

Here's something to keep you busy and give
you something to satisfy your sweet tooth!

Homemade butter caramels.
They are soooooo amazingly delicious!
You'll hide them in your coat pocket so you can find them one afternoon
when you think they're all gone so you can have a sweet surprise!
Oh, wait...maybe that's just me.


These tasty caramels are part of the legacy that is my mother-in-law.
She passed away this past summer after a long battle with cancer.
This post is a tribute to her.

It was 16 years from her initial diagnosis to her death...
and let me tell you, she filled those 16 years with as much life as she could.
She traveled, she had good times with friends and family,
she spoiled her only granddaughter,
and just over 6 years ago she married a good man.
Who says you can't find love later in life?


She was tough, she was a fighter...but she was good-hearted and generous.
Did we always see eye to eye?
Of course not, we're family after all.
But we agreed on the tremendous love we had for her son, my husband,
and her granddaughter, our daughter, Sara.
She raised a son into a wonderful man whom I love more than
anything and I will forever be grateful to this woman.


Okay...on to the sugar.
You'll need a candy thermometer to gauge the temperature so
you don't end up with runny or rock hard candy.


I used a Pampered Chef silicone spatula to stir because they have a high heat tolerance.
You'll also need extra arms, because you'll be stirring and
stirring and stirring until you think the arms you have will fall off!


See? An action shot...of the incessant stirring...


Ahead of time, you'll want to prepare your cookie sheet or baking sheet for cooling.
I used a cookie sheet and lined it with parchment which
I also buttered so the caramel wouldn't stick.


Once they're cool, turn them out onto a large cutting board and use a heavy,
sharp knife to cut them to the size and shape you want.

Be careful.
Caramel is rather hard and you'll be using a lot of pressure on the knife to cut it.
I wouldn't want any of you to injure yourself in the name of sweets.


My MIL used wax paper squares to wrap her caramels.
I don't buy wax paper, so I have always used parchment squares.
The parchment I purchase has a silicone
coating so it works similar to the wax paper.


If you use a smaller pan to cool them, you'll get fatter caramels.
I kinda like them flatter...to me they're easier to bite...
but that's totally up to you.


You will have to excuse the Christmas tree and packaging.
I had fully intended to get this out to you in time for gift giving.


However, life gets in the way sometimes and we just have to adjust our sails.
So...just pretend these take-out boxes really have hearts
on them and give them away for Valentine's Day!


I asked her one time if this was a secret family recipe because I wanted to share it.
She laughed and said she had found it in some magazine
she could no longer remember and thought they sounded good.
She'd been making them every holiday season
since and loved to give them as gifts.

My husband's cousin's wife (got that?) got the recipe from
me in December so she could make some to take to Christmas dinner.
It was a heart-felt gesture and a wonderful surprise to her MIL,
my MIL's sister, and my MIL's husband.
They were very touched by her thoughtfulness.

A legacy of sweetness.


Grandmas Butter Caramels
  • 1 lb real butter
  • 2 ¼ cups packed brown sugar (I used dark, she used regular)
  • 1 cup Karo syrup
  • 1 can sweetened condensed milk
  • ½ cup chopped walnuts (optional)
  • 1 tsp pure vanilla
  1. Mix all but vanilla in a heavy saucepan. Bring to a boil, stirring constantly.
  2. Continue to stir and stir and stir until mixture reaches 243° on a candy thermometer.
  3. Remove from heat, add vanilla, mix well.
  4. Pour onto a well-buttered cookie sheet or baking pan, spread evenly.
  5. Let cool; cut into squares or rectangles, or whatever your heart desires.
  6. Wrap in wax paper or parchment squares.
  7. Indulge often.

Make some caramels.
Hug the ones you love.

Tuesday, January 13, 2015

Happy New Year! 2014's Top Ten!


Okay, well, I'm only slightly behind.
I mean, January's not quite half over yet, right?

It has been super crazy nuts around here the last few weeks.
So, without further ado,
allow me to present to you the top 10 from 2014!!!

I know, I know...
you're thinking...didn't I only post ten times last year?
No...I actually did a few more than that!
:)


As always, I feel these numbers would be totally
different if posted at different times of the year.


9. Taking you into the clouds in my Valentine's "heart-air" balloon.


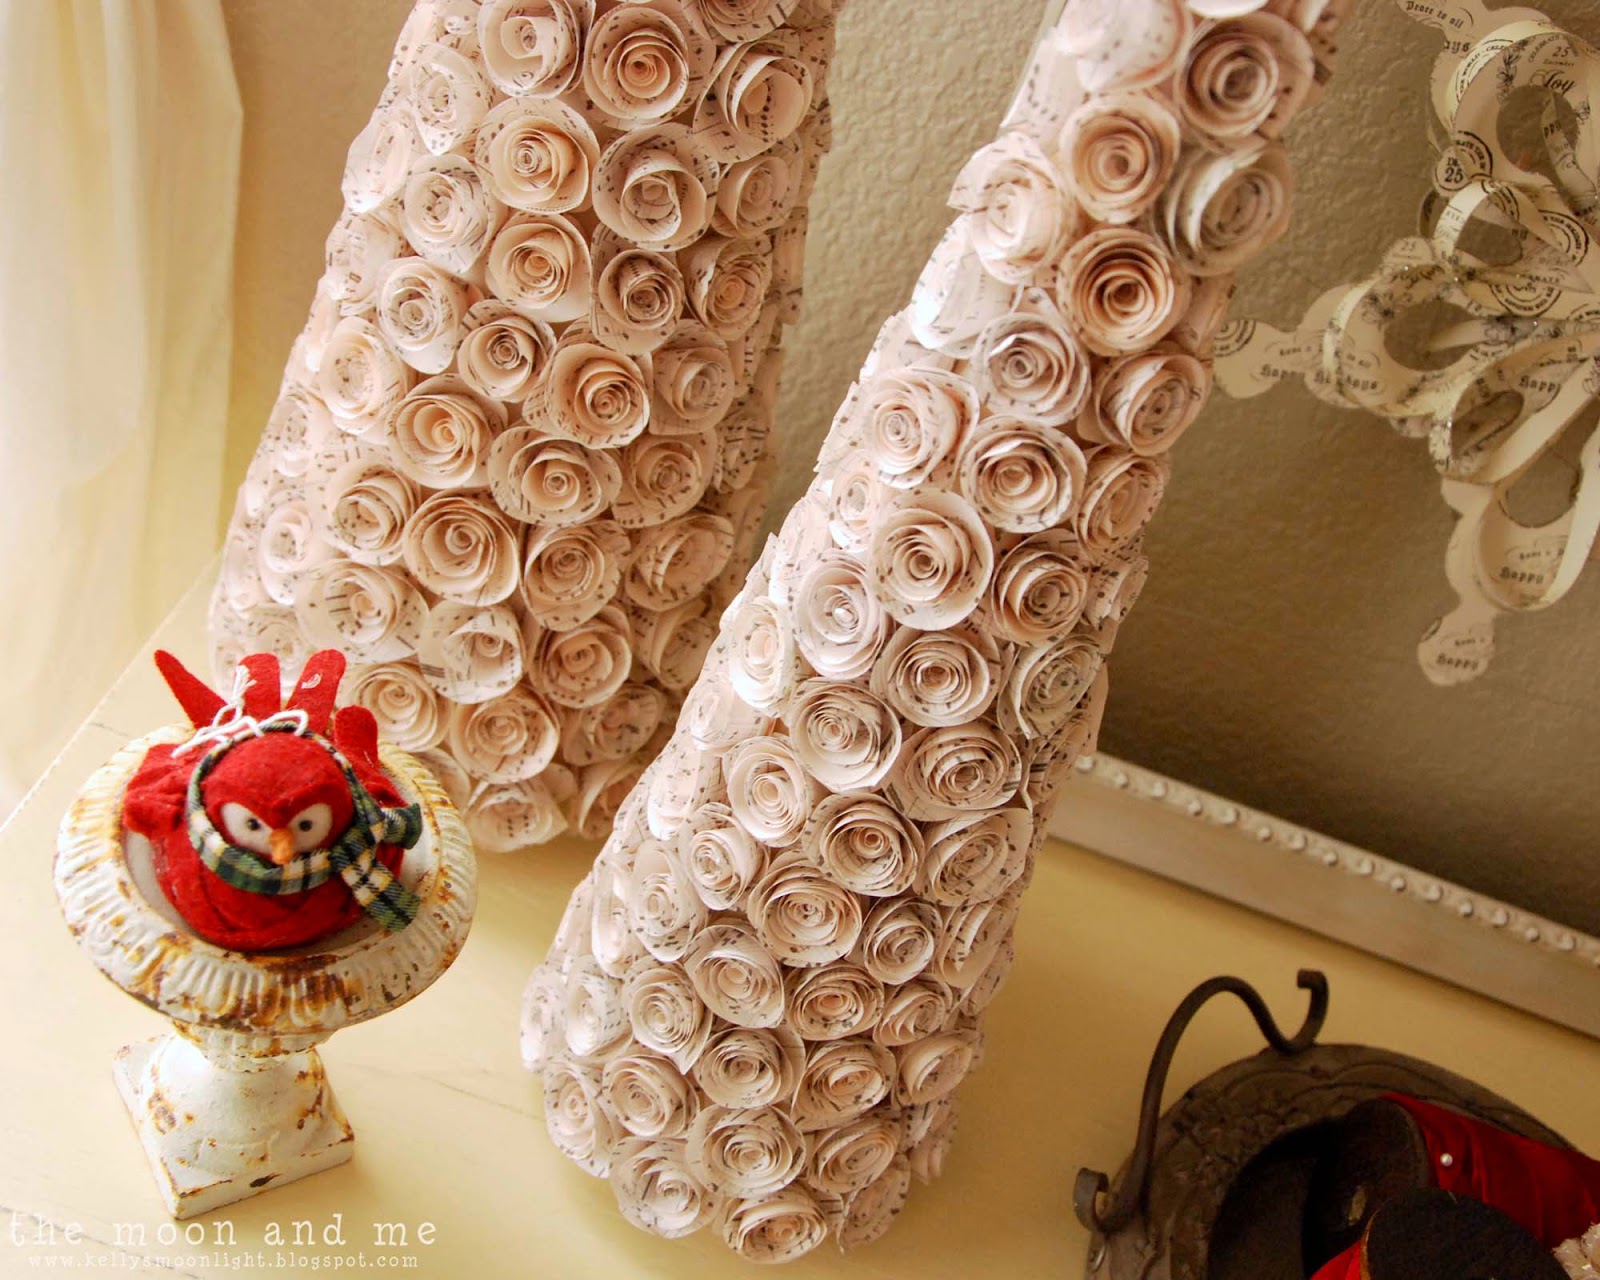
8. Absolutely wonderful and totally time consuming Paper Rose Trees.


7.  The "I still love going in there just to look" Planked wall bathroom.


6. The "keep calm and eat breakfast" Cheesy Egg and Sausage Bake.


5. "I can't believe I ate all the frosting" GF Chocolate Cupcakes with Peanut Butter Frosting.


4. The secret makeover of Sara's purple palace.


3. The Chalk Painted Dresser of my dreams.


2. The great TV Console maker
and the single most popular post from last year...


The super easy customizable DIY personalized cutting board.

And there you have it!
I had lots of fun in 2014 doing all these projects...
I hope you enjoyed them, too!

2015 looks to be challenging for my blogging time.
I just changed jobs and have much less free time now...
although I am totally stoked for this new adventure in the new year.

I know I promised a sweet treat before Christmas...
I am hoping to get it out to you in time for Valentine's day.

Until then, keep smiling!


Sharing here:

Craft Dictator
AKA Design
Crafts a la Mode
I Heart Naptime
The 36th Avenue
Reasons to Skip the Housework
I Should Be Mopping The Floor
The Chicken Chick

Wednesday, October 22, 2014

Cookie Dough Jack-O-Lantern Truffles


Halloween is a perfect time to send a fun
care package to your favorite college student!

You should definitely include some of these yummy cookie dough jack-o-lanterns.
If you can keep from eating them yourself.


Cookie dough is one of Sara's favorite things.
I thought it would be awesome to send some
homemade treats and scare up a little yum.

I looked for some ideas online, but most called
for using a can of sweetened condensed milk.
I found this odd...since it's not a normal ingredient in chocolate chip cookies.
At least not the ones I make.


So I just messed around with my favorite recipe until I got it just the way I wanted.
I used a small scoop, just like when I bake real cookies...
so they'd be a uniform size.
Roll them into balls, place on parchment or freezer
paper on a cookie sheet, and freeze until firm.


I dipped them in orange colored vanilla candy melts from Wilton and let them set.
BTW, I think I am the worst candy dipper in the universe.
My truffles, cake balls, whatever, are never smooth and pretty.
Guess it's a good thing they taste good!


Using a toothpick and some melted chocolate,
add the eyes and nose while they're sitting on your cookie sheet.
You can do the mouth now, too, if you want.
It was easier to pick them up to add the mouth, but doing the whole
face while holding it made the candy coating melt in my hot little hands.


Yes, I am aware their smiles are lopsided.
Snarky little things.


Hi.
We're not..............watching.................you.
Honest.


I'll show them...just bite their face off!


I packaged them up in cellophane bags with cute tags.
But those darn jack-o-lanterns would not stack nicely.


I said, if you guys don't start cooperating, heads are gonna roll.

Ba-dum-bum...


But they just sat there and stared at me with
those happy little smirks on their faces.

Jerks.


But you can't send a care package with just one thing!
Among other things there was a Practical Magic DVD and
I included some of these cute Halloween pedi gift bags...
inspired by Being Bianca.
To have and to share...roommate, littles, friends
Spread the love around.


Cookie Dough Truffles
  • 2 sticks butter, softened
  • 1 1/4 cups brown sugar
  • 2 tsp pure vanilla
  • 1 3/4 cups flour
  • 1/4 tsp salt
  • 3/4 cup mini chocolate chips
Beat butter, sugar, and vanilla until smooth.  Whisk flour and salt together and then add to creamed mixture until blended.  Add chocolate chips and mix well.
Form into balls and freeze until ready to coat using chocolate or candy melts.


Have a sweet week!


Sharing the love here:

A Simple Pantry
Crafty Allie
Just a Girl and Her Blog
Maison de Pax
The Blissful Bee
Savvy Southern Style
Adorned from Above
Ivy and Elephants
Lamberts Lately
Saving 4 Six
Bloom Designs
Live Laugh Rowe
From My Front Porch to Yours
Embracing Change
Nancherrow
Pure Grace Farms
Craft Dictator
AKA Design
Crafts a la Mode
The Golden Sycamore
Love Bakes Good Cakes
Liz Marie Blog
Happy and Blessed Home
Simply Sweet Home
The Answer is Chocolate
Tidy Mom
Chic on a Shoestring
Lolly Jane
Dwellings
I Should Be Mopping the Floor
A Peek Into My Paradise
Life on Lakeshore Drive
Simple Nature Decor
Etcetorize
The Chicken Chick
VMG206
Sand and Sisal
Home Stories A to Z
The Dedicated House
Upcycled Treasures
Sowdering About
A Stroll Thru Life
Stone Gable
Love Grows Wild
Horrific Knits
Carissa Miss
Fluster Buster
Sincerely Paula
What's Cooking Love

Friday, August 29, 2014

Strawberry Cheesecake Ice Cream


Summer might be almost over,
but there's always time for ICE CREAM!!!


I had this hankerin' for some cheesecake ice cream...
and I had some strawberries calling out to me from the freezer.
I couldn't find a decent recipe so I gleaned the basics
from a couple and decided to experiment.


Now, in my best mad scientist voice I will tell you...
THEEES EES ZA YUMMIEST ICE CREAM EVVVVVVER...BWA-HA-HA-HA!

Okay, back down off the roof, Frankenfurter.


It was too good not to share.
I scooped up a pint and took it to the neighbors along with some cookie bars.
They have been awesome and I couldn't think of a tastier way to say "thank you."

Strawberry Cheesecake Ice Cream

  • 2 cups heavy cream
  • 1 cup milk
  • 1 cup sugar
  • 2 large eggs
  • 2 tsp pure vanilla
  • 8 oz cream cheese, softened
  • 1 pint strawberries {fresh or frozen}
  • 1/2 cup sugar
  • 1 tbsp lemon juice
  • 1/2 cup coarsely crushed graham crackers
  1. In a heavy saucepan, whisk the eggs until well blended.  Whisk in the cream, milk, and 1 cup sugar.
  2. Slowly heat to a simmer, stirring frequently...let cook at a bubble about a minute. Stir in the vanilla. Remove from heat.
  3. Cut the cream cheese into chunks and stir into the hot cream mixture until mostly smooth. Cool mixture completely in the fridge.
  4. Using a hand blender, chop strawberries with remaining 1/2 cup sugar and lemon juice. Leave them a little chunky. Crumble the graham crackers...but don't make them too fine.  I just beat them on the counter with my hand. :)
  5. When the cream mixture is completely cool...add to your ice cream maker. Mine takes about 15-20 minutes...after about 10 minutes, I added 1/4 cup or so of the strawberry mix and half of the graham crackers.
  6. Add the remaining graham crackers close to the end.  Swirl in the remaining strawberry mix with a spoon when you transfer it to a freezer container. 
  7. Eat it right away as a soft serve or stick it in the freezer for later!
I know, it seems like a lot of instructions, but it's really simple and totally worth it!

How about you, would you share?
Labor Day is just begging for ice cream!

Have a fabulous holiday weekend!

Wednesday, June 11, 2014

Super Fudgy Mocha Almond Flourless Brownies


Howdy, howdy!
Did you miss me?
I know I've not been around much lately,
and I don't see it improving any time soon.
So, you'll have to accept these scrumptious treats as a consolation prize.
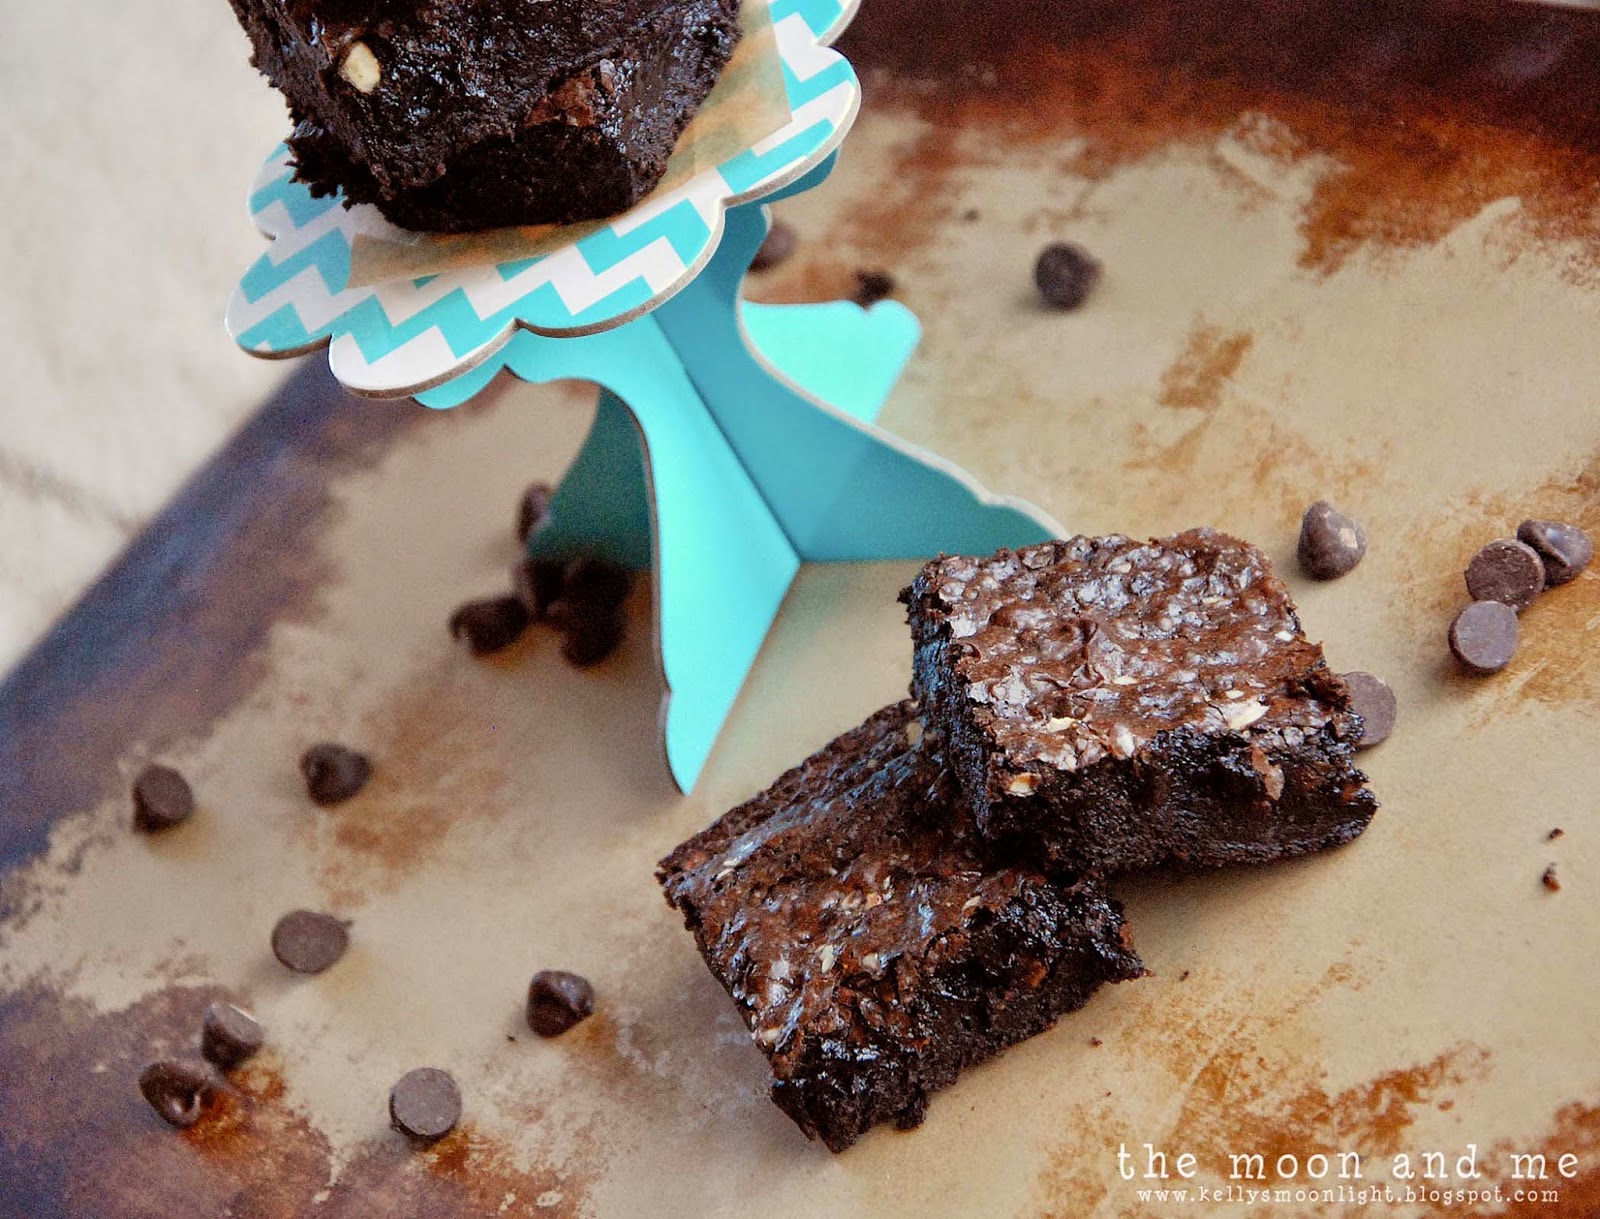
Mocha Almond Flourless Brownies.
Not a bad trade, huh?


We've just been so busy trying to get
stuff done around the house...inside and out.
In the summertime there are even more things that need done, you know?
I'm trying to get the finishing touches on the bathroom redo...
and there are only so many hours once I get home in the evening...


And Supergirl, Sara...she's got a fabulous internship with
the Colorado Ballet this summer, so we only see her on the weekends,
and we try to make the best of those.
So, as much as I love being here to share with you guys,
it just won't be as often until things slow down around here.


In the meantime...these are worth turning the oven on for...
They really are super fudgy and totally delectable!
You might just want to make a double batch
and hide half of  them in your secret stash.
Don't tell me you don't have one.


Mocha Almond Flourless Brownies
  • 1 cup chocolate pieces (dark or semisweet, morsels work great)
  • 1/2 cup coconut oil
  • 4 eggs
  • 1/2 cup white sugar
  • 1/2 cup brown sugar
  • 1/2 cup cocoa powder (I actually used 1/4 cup reg and 1/4 cup dark)
  • 1/2 cup almond meal or flour
  • 1/2 tsp salt
  • 1/2 tbsp espresso powder (or instant coffee if that's what you've got)
  • 2 tsp pure vanilla
  • 1/2 cup or more roasted almonds, chopped
  1. preheat oven to 350°
  2. melt the chocolate and coconut oil over medium heat
  3. whisk the eggs and sugar together until creamy, gradually stir in the melted chocolate
  4. stir in the almond meal, cocoa powder, espresso powder, salt, vanilla, and almonds
  5. pour into a well-greased or parchment-lined 8 X 8 baking pan
  6. bake at 350° for 20-25 minutes
  7. cool completely, cut and devour

They will almost seem as if they are not quite done,
because they are so moist and fudgy, don't be fooled.
Just eat 'em!

I hope you're having a stupendous week!
See you next time!


 Feeding the chocolate addiction here:

Saturday, April 12, 2014

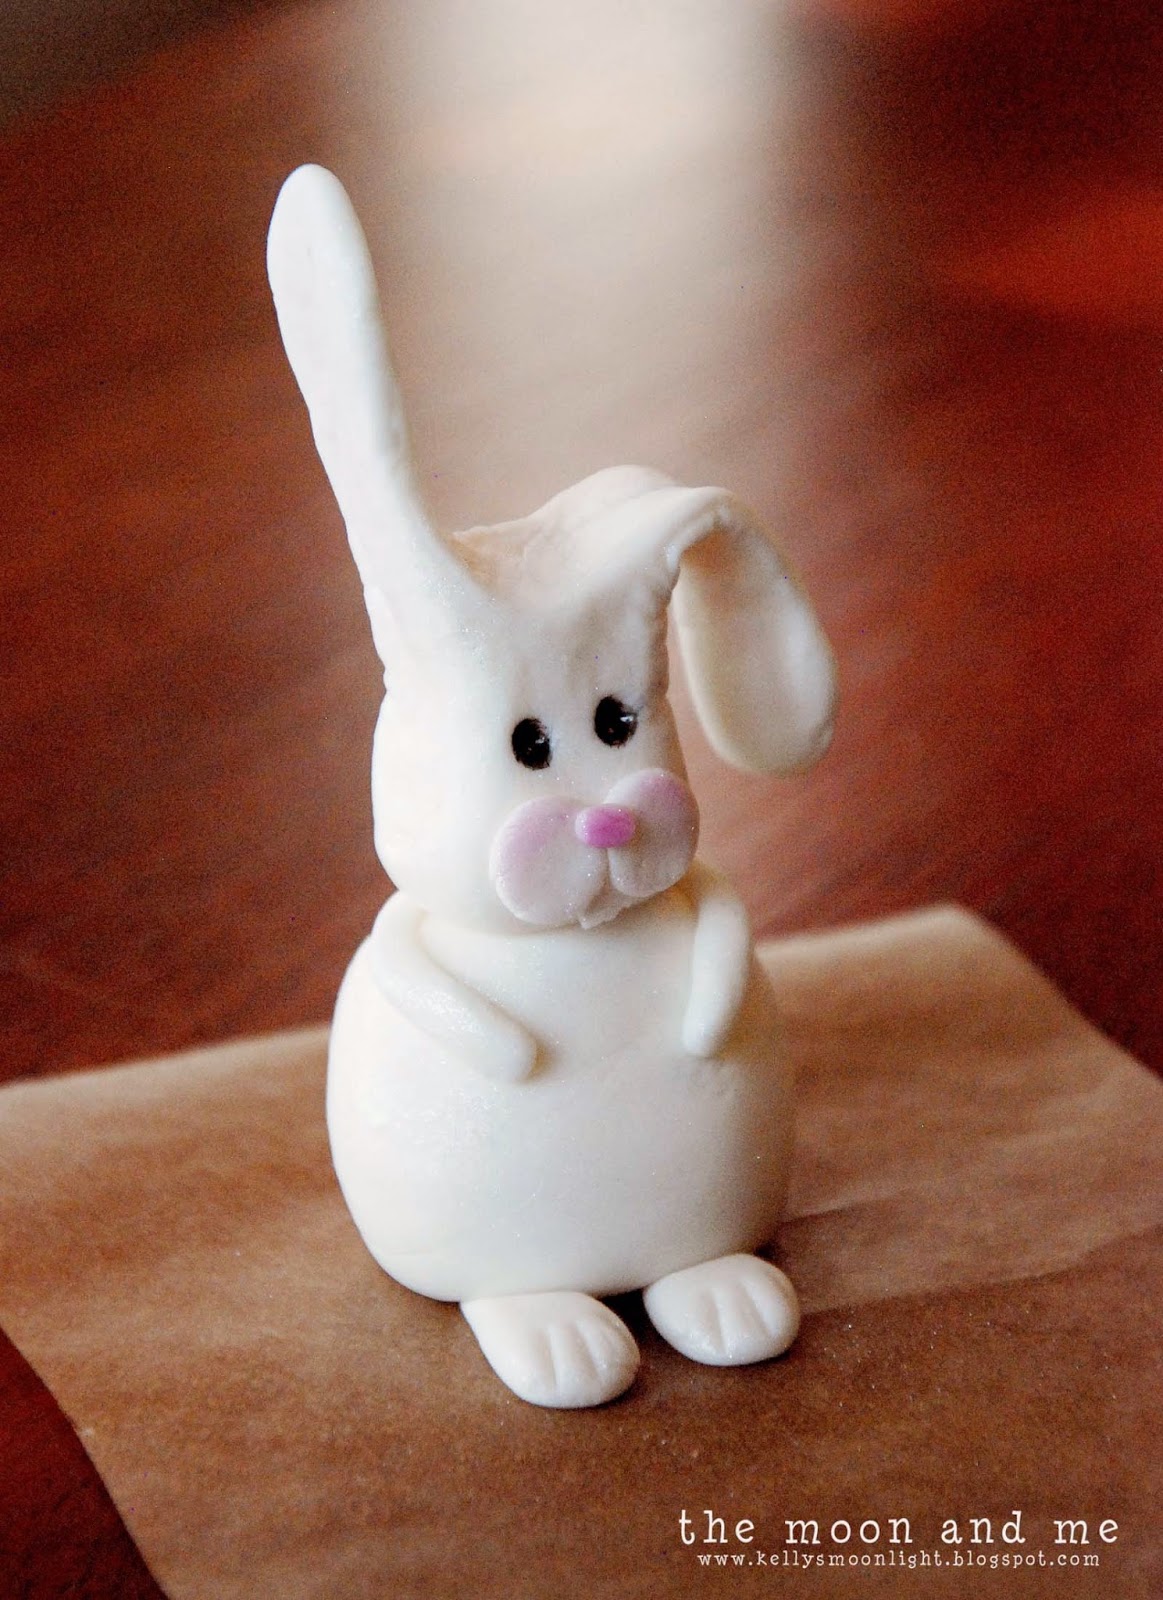
How To Make A Fondant Bunny

I don't do a lot of "decorating" for Easter...
so I didn't figure I had anything fun to share...

Then myself reminded me that I had made a little Easter cake
a couple of years ago with one of these cuties on it:


Myself has a bad habit of remembering things at the very last minute...
so that is why you are getting this little tutorial
ONE WEEK before EASTER!
So sorry. :)


Most cakers use gum paste for figures...
if you want them rock hard faster, do that.
I just use fondant because I'm impatient and don't like messing with gum paste.

Satin Ice is my favorite...especially if you plan
to use it on cake and actually EAT it.
(this White Buttercream flavor is new and pretty good)


Get yourself a nice sized glob of fondant...
and cover the rest up...it dries out quickly.


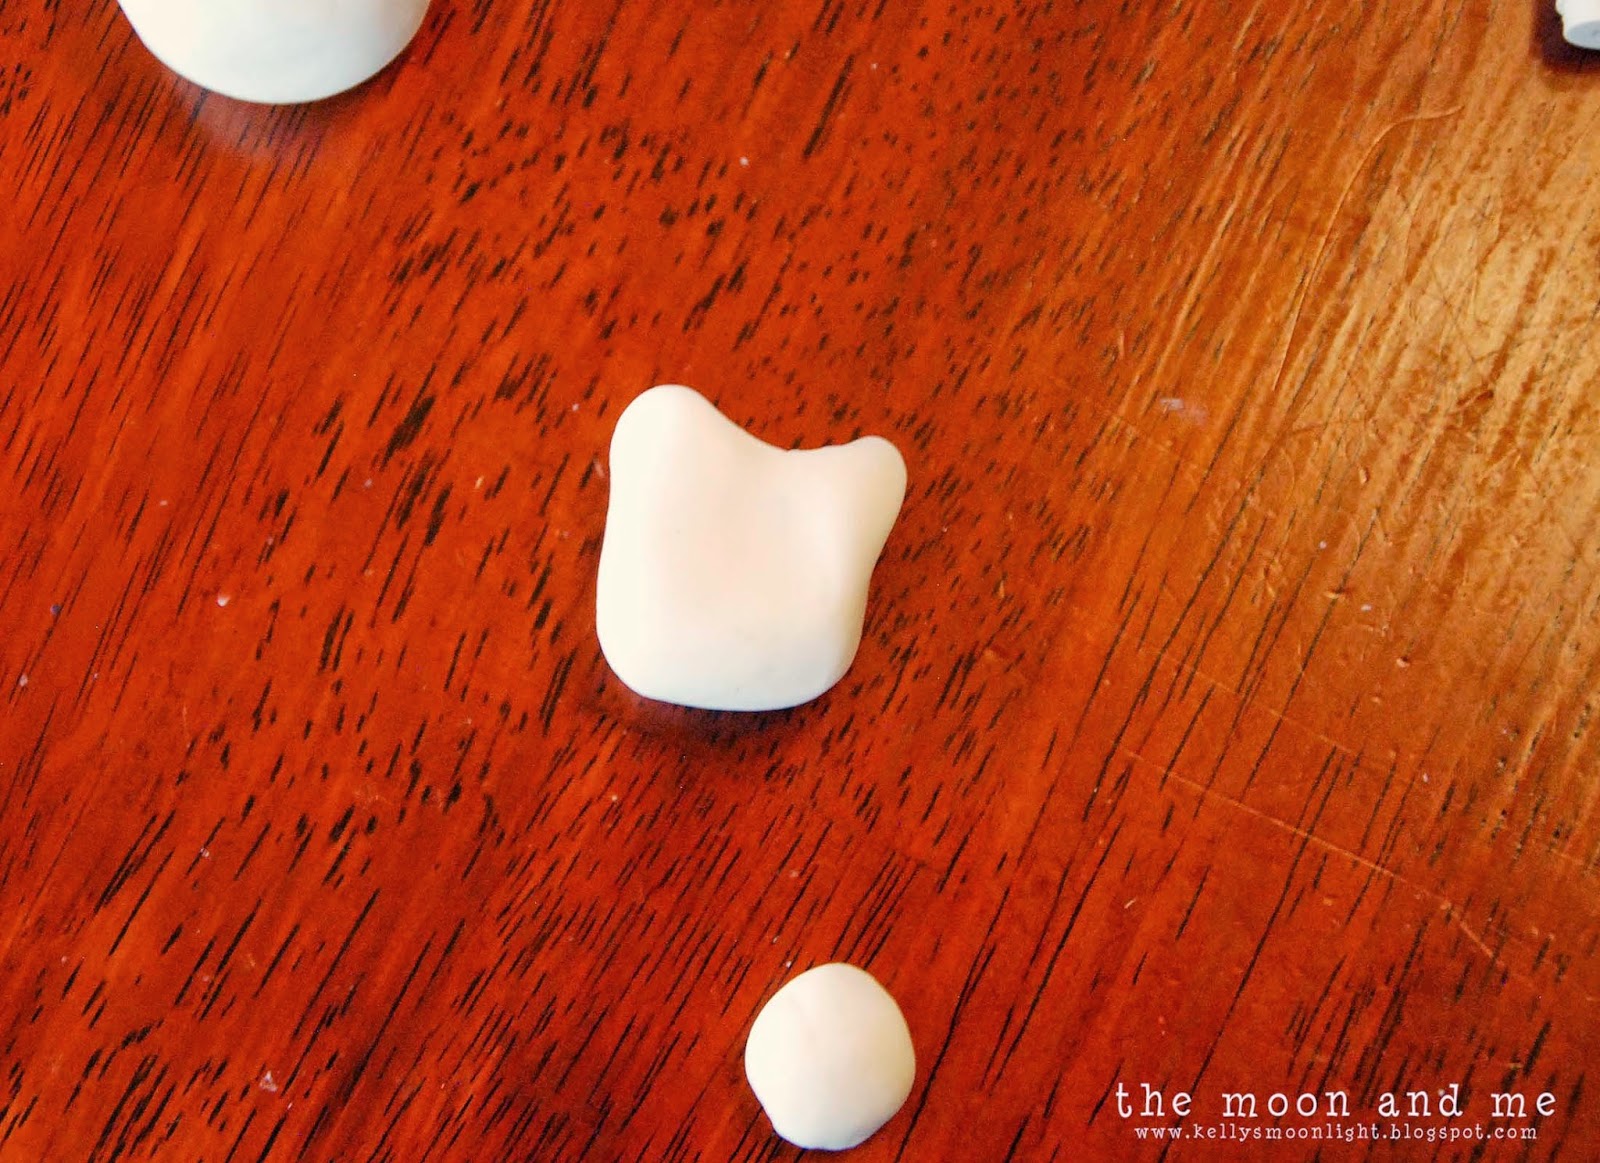
Divide your fondant into 3 sections about this big.
I actually had a little too much and ended up with a chubby bunny.

Side note: did you ever play that game in youth group where
you had to stuff your mouth with as many marshmallows as
you possibly could and then say "chubby bunnies" several times?

***insert crickets chirping***

NO?

Welllllllll........me neither then, I was just checking.


Anyway...
Take your middle sized ball and start to pinch one side to shape the ears...


Just keep working it and smoothing it until you get the length you want.


Next start to shape the rest of the head...mine has fat cheeks...


and from the side you can see I tried to make the
bottom of his face elongated like a bunny's.

Shape your largest ball into a sort of bunny body.
Adjust size if necessary.


from your smallest ball take a couple equal pieces and shape the feet


Make the side that goes under the body flat and dab with a little
water on the end of your finger to stick them to the bottom of the body.
Use a tooth pick or the edge of a knife to make some bunny "toes."


Take two more small equal pieces and roll into arms.
Flatten the top edges and attach to top of body portion using a dab of water again.
These should be placed so that they're under the head once it's on.


Now to finish the face.
You should have a little piece left...
from that make two small flat, round pieces...cheeks
one very small long round piece...nose
and a small rectangular piece with a dent in the middle for the teeth.


Petal dust (top) is great for coloring fondant, but not always readily found.
You can get it at cake and candy supply stores and some kitchen stores.
However, pearl dust (the long tubes), is made by
Wilton and can be found at Hobby Lobby.
  
Attach the face pieces in this order...
Teeth
Cheeks
Nose

Using a clean paint brush, I applied the petal dust and made my nose dark,
and used a little less to make my cheeks rosy.
You can do the same with the pearl dust, it may just be lighter.
(I used the white pearl dust over the WHOLE bunny once he was done)


Using the other end of the paint brush, make two small dents for eyes...


Can you see them there?
If not, no big deal...


Use an edible food marker to fill in the eyes...
these have a nice wide pointed tip, so you could even
JUST use the marker to make the dents.


Now...comes the waiting.
As you can see, my bunny is sitting on a piece of parchment...
That is so he doesn't stick to the table.
You could also use wax paper or the shiny side of freezer paper.

Shape your bunny ears how you will want them to be when they harden.
One up, one down...both floppy, whatever.
But he needs to set up and harden AT LEAST
overnight for his ears to stay standing.

Once the fondant has hardened, place the head on the body,
you can use a little water dabbed again, to make the
body and bottom of the head sticky and attach.
(you can use a toothpick for more stability...make sure you place it
while the fondant is still soft, and make the hole in the body also.
 Then allow to dry inserted into the head.)


Look at that face!!!!
Now you have an adorable little bunny
to put on top of your Easter cake.
Well, I guess that is if you MADE an Easter cake.


 Little Bunny Foo Foo
hopping through the forest...


...scooping up the field mice
and boppin' 'em on the head...


OOOPS...
Wrong bunny...


Don't you just wanna pinch his cheeks?

Here is my original bunny sitting on his little cake.
I went to find him (I still have him) in his box,
and his ears had broken off! (The old one, not the new)
It was very sad. :(


The "eggs" are colored fondant, so are the rolled flowers.
And the grass was easy...just use the grass tip with some green buttercream.


Ta DA!

Doesn't he just make you smile?
He does me!

 I know this is last minute, but I hope I've inspired you to
make your own little bunny for your Easter dessert this year.
Let me know if you give it a try...
and if you have any questions.

Have an awesome weekend!


Hopping along to these parties: