Showing posts with label crafty. Show all posts

Thursday, June 29, 2017

A Stenciled Dresser Makeover

In a shocking news release...
I have NOT dropped off the face of the Earth!
But that is a story for another day.

Once upon a time I wrote a little story about a clock.
In the course of that tale you were introduced
to a started, although long neglected, project.

Enter the dejected dresser...

This dresser, or chest of drawers, once belonged to my mom.
While it was the first real furniture she had growing up,
it wasn't particularly pretty, and she had no sentimental attachment to it.


You can see in the picture above that at the time I took this
picture, 4 1/2 years ago, I had already started the redo.
However, that had been another 2+ years before that.
I know, right?

It had these mid mod grooves and sharp, tarnished, and
deformed metal pulls where the knobs are now.
You can see the color of the metal on the top pulls,
although those aren't the same style.
The ones I had already removed were bent hook-like things that
gouged your flesh should you get too close when passing by.


Since it is actually solid wood it made my job a little easier.
I filled all the grooves with wood filler and sanded them smooth.
I also filled the holes for the top pulls so I could drill new holes
for the wood knobs to match the other drawers.


I somehow neglected to take any pictures between the beginning and end.

I painted the bottom with home mixed chalk paint.
This was a sample I had of BM Revere Pewter.

I started out painting the whole thing and didn't like it.
So I sanded the paint off the top and went with stain.
I usually cheat and use the stain/poly mix because I'm lazy efficient.


Once it was painted, I used this adhesive vinyl stencil I ordered from Etsy.
(It doesn't look like that seller is currently active)
It was just what the doctor ordered.

Perfect!


I distressed it ever so lightly around the corners and sealed it with wax.


Mmmm...mmmm...mmm.

I used the same stain from the top on the knobs, too...
(which are just basic wood pulls I picked up at Home Depot)
and the finished piece is beautiful.


And now for a few too many pictures...


Here it is in it's home in the guest bedroom...
which I will try to share sometime in the near future...
or before the end of the year at least!


I love this transformation!!!


I hope you'e enjoyed this makeover.
I do have a few other things to share.
I haven't been completely idle in my absence...
just unable and/or unmotivated to write about it.

I hope some of you re still out there!
I've missed  you!

Hope your having a great summer!
See you soon...


Sharing here:

Eighteen25

Tuesday, October 27, 2015

Love From Your Mummy: A Halloween Chalkboard Care Package


It's time once again to remember your favorite college students,
far away friends and relatives, and loved ones serving overseas.

Yes, I know I'm a little late. Again.
I was out of town and just got this finished up.
Sorry.
You can pin it for next year.

But...it was worth the wait!
It's Love From Your Mummy!!!


A totally awesome Halloween Chalkboard Care Package!
I'm almost more excited about the box than the stuff inside!
Seriously.
But I'm a dork.

I started off painting the inside with black craft paint.
I added orange polka dots with more paint.

Use different coordinating scrapbook paper for the flaps.
On a side note...I love scrapbook paper.
But I don't scrapbook.  So There.


I wanted to make the outside cute, too.
I started off just painting it like the inside.
Then I had a brilliant idea!
Chalkboard, baby!

The cardboard kinda soaks up the paint a little making the surface a little rough.
I knew it would be easy to replicate a chalkboard look even without chalkboard paint.
I did go ahead and rub some chalk over the surface and wipe it
off with a paper towel before painting for more authentic look.

I haphazardly, but precisely (lol), painted my words with white paint.
I didn't want them too perfect, but I wanted them to have nice form.

Then using a sanding block I lightly distressed the entire thing and lightly dusted it off.


The result was a beautiful thing.
Really.
Just look.


I did two full sides...

Love from your Mummy
and
May contain: things that go bump in the night


The other two sides I just filled in with mini chalkboard scenes.


My furry helper approved...


But wait...what about the Halloween treats inside????

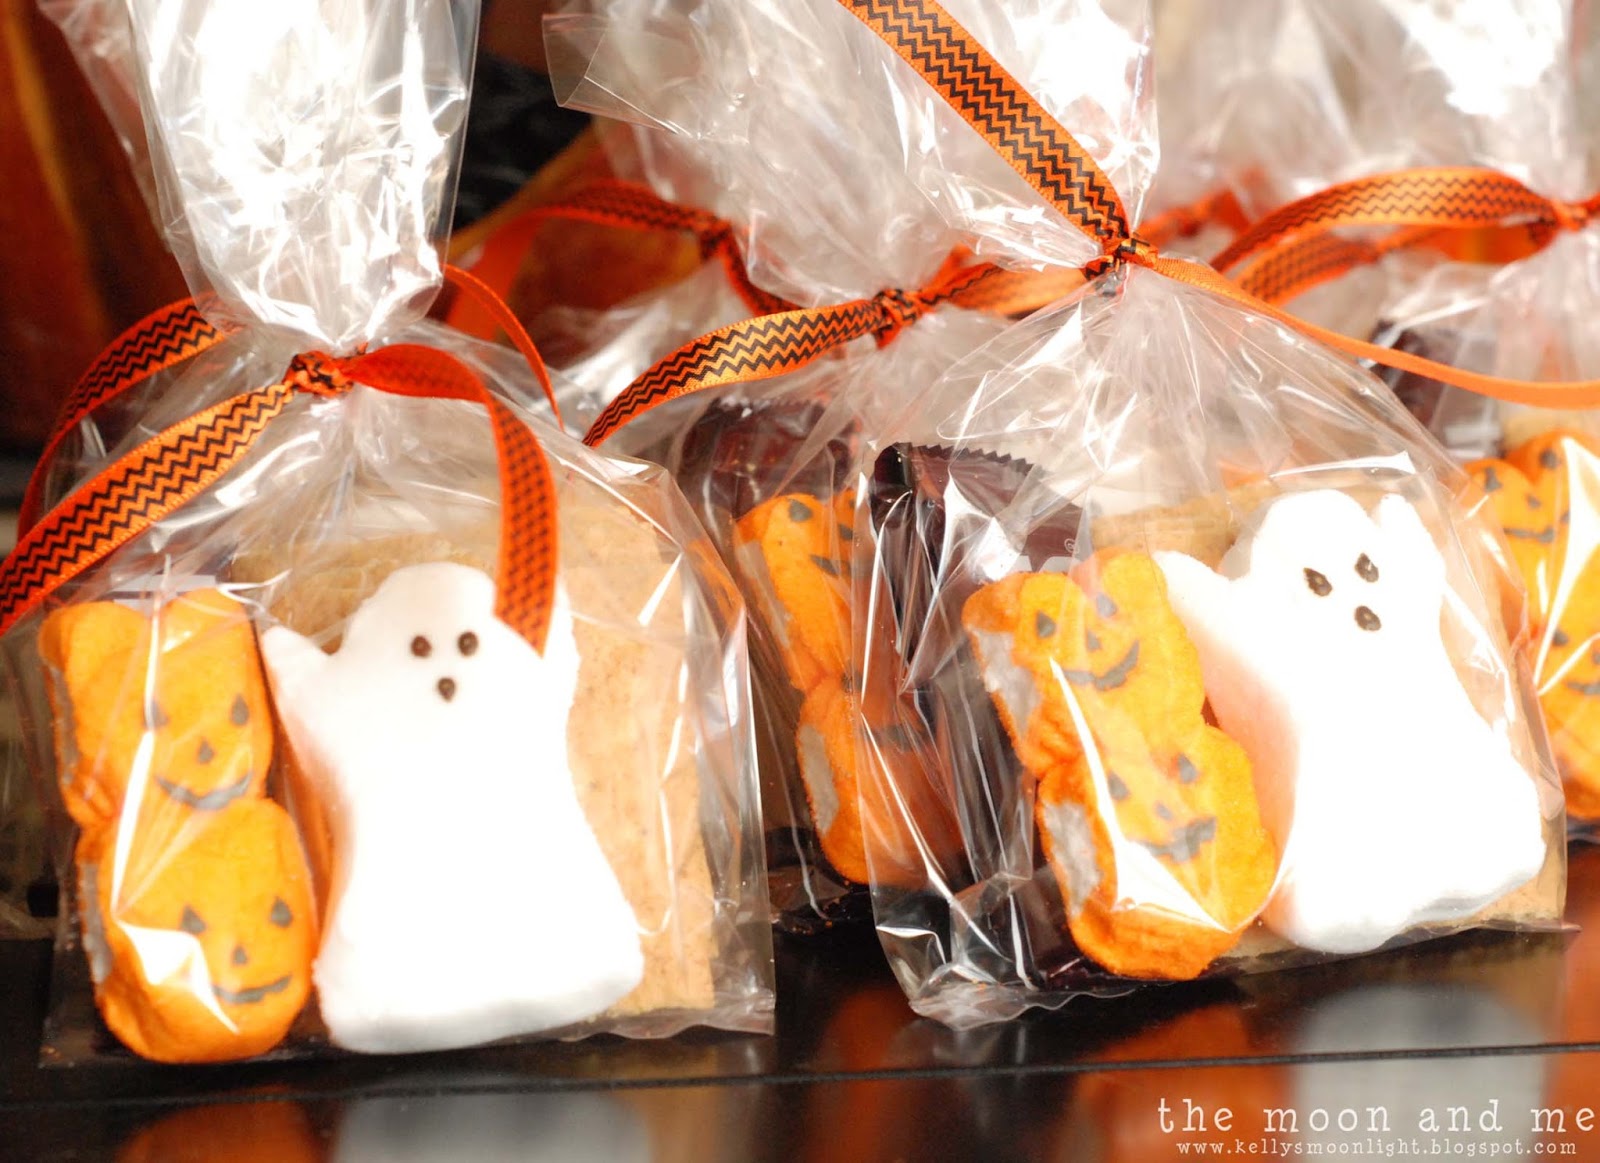
I made up a bunch of these adorable Halloween S'mores treat packs.


Each one has 4 graham cracker halves,
2 mini Hershey bars, 2 pumpkin peeps, and one ghost peep.

Mr. Ghost looks a little angry.
Maybe someone ate his I Scream.


Look how cute they are!
I just love them!


What good is a Halloween care package without a good movie.
Sara doesn't like scary movies so I always look for
something a little more on the fun side.

I know she hasn't seen this one...and it's a musical to boot...
Little Shop of Horrors is the perfect choice.


A little trick or treat candy, some decorations,
other random stuff...and you've got yourself
a howlin' good Halloween care package.

Full of Love from your Mummy.


  I hope you've enjoyed this last minute Halloween gift idea.
I know I had way too much fun creating it.

The lady in the mailroom at the college told Sara
she always knows when a box comes in for her.
I always decorate them in some way.
I think she's really going to like this one.

I've got a little giveaway coming up next week so be sure to stop by!

Until then...
beware of those things that go bump in the night.


Scaring up a little fun here:

Tuesday, January 13, 2015

Happy New Year! 2014's Top Ten!


Okay, well, I'm only slightly behind.
I mean, January's not quite half over yet, right?

It has been super crazy nuts around here the last few weeks.
So, without further ado,
allow me to present to you the top 10 from 2014!!!

I know, I know...
you're thinking...didn't I only post ten times last year?
No...I actually did a few more than that!
:)


As always, I feel these numbers would be totally
different if posted at different times of the year.


9. Taking you into the clouds in my Valentine's "heart-air" balloon.


8. Absolutely wonderful and totally time consuming Paper Rose Trees.


7.  The "I still love going in there just to look" Planked wall bathroom.


6. The "keep calm and eat breakfast" Cheesy Egg and Sausage Bake.


5. "I can't believe I ate all the frosting" GF Chocolate Cupcakes with Peanut Butter Frosting.


4. The secret makeover of Sara's purple palace.


3. The Chalk Painted Dresser of my dreams.


2. The great TV Console maker
and the single most popular post from last year...


The super easy customizable DIY personalized cutting board.

And there you have it!
I had lots of fun in 2014 doing all these projects...
I hope you enjoyed them, too!

2015 looks to be challenging for my blogging time.
I just changed jobs and have much less free time now...
although I am totally stoked for this new adventure in the new year.

I know I promised a sweet treat before Christmas...
I am hoping to get it out to you in time for Valentine's day.

Until then, keep smiling!


Sharing here:

Craft Dictator
AKA Design
Crafts a la Mode
I Heart Naptime
The 36th Avenue
Reasons to Skip the Housework
I Should Be Mopping The Floor
The Chicken Chick

Wednesday, December 3, 2014

Paper Rose Christmas Trees


It's beginning to look a lot like...
CHRISTMAS!

And I am so excited!
Really.
Because I love Christmas!
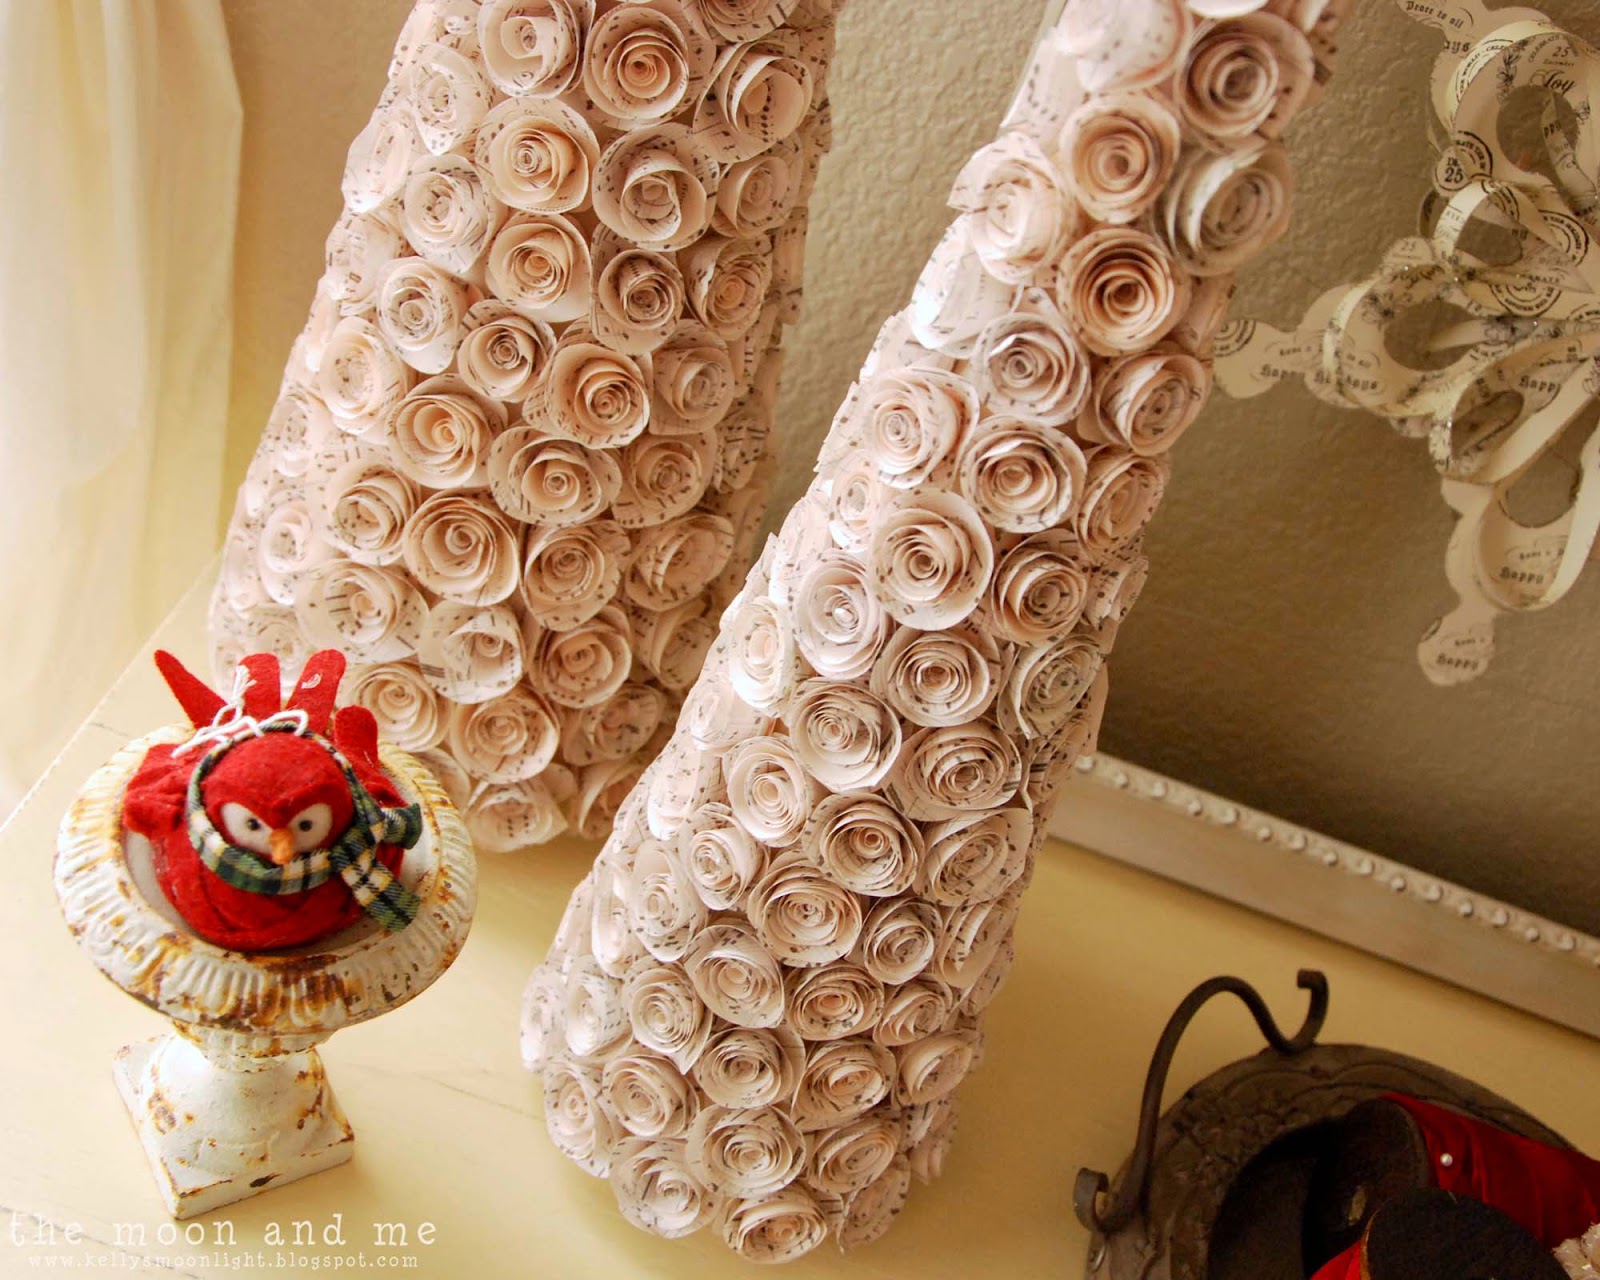
And I love love love these paper rose trees I made...
that I'm going to share with you!


See them there...on the left?
And below?
Oh.My.Goodness.

Tons of paper roses all happy together.
Wanna make one, too?  Or two, too?
Or tutus.
But that would be a different post.


If you've never made a paper rose before...
never fear...I am here to help!

Cut a circle out of paper.
Very complicated, I know.

I used an image I found online somewhere...
and for the life of me I can't figure out where I got it.
Possibly the Graphics Fairy, but I can't find it anymore.
It's old sheet music...I printed it double sided on a draft setting so it was light.


Once you have your circle,
begin cutting a spiral to the center...
not too thick or too thin...
and make sure you leave a small "base" in the center.


Now, ignore my dry cuticles and start rolling the paper
rather tightly from the outside edge all the way to the center.
It will seem tight at first, but will end up looser at the end.


See? Once you let it go, it unravels slightly.


Now is when the center base is important...
using a good tacky glue...add a good blob to your base and
press the scrolls into the glue and let them dry.


I painstakingly glued them to some paper mache cone
trees that I painted with a creamy base color.
These trees are from Hobby Lobby and have a base that is
smaller than the tree and I like that it makes it sit above the surface.


You can adjust the size of your roses by making your
original paper circles smaller or larger.
I used about 3 different sizes on my trees.

From one sheet of regular paper, fold it to get either 4 or 6 circles...
if you do 4 even squares for your 4 circles, that leaves a
section that allows you a couple smaller circles...
that work great at the top of your tree.


I knew all along that I wanted to display them on
the little painted dresser in the living room.
I had fun looking for some pretty things to get the look I wanted.


I found the gorgeous velvet ribbon at TJMaxx and had
intended to use it on my little trees in the loft, but it just
seemed to work so well to tie together the little birdie and
the red mercury glass candlestick.


I think I'm going to leave it just like that!


Or I was...
until I threw in a few clippings from the fresh
cedar I got for the fireplace mantel.
Which I've decided to share separately,
so I didn't make this post extremely long.

Ugh.


This process was rather time consuming.
By rather, I mean very.
I cut, rolled, and glued roses in my spare time and while watching TV.
Then I glued the roses to the trees also while watching TV.

It takes longer than you'd think because you have to wait
for one row to dry before adding the next so they
don't shift when you get them close to each other.


I don't know exactly how long it took...but a good chunk of time.
As for me, I think it was totally worth it.
I love the way they look, they are perfect with my traditional
colors for red and white plus green,
and I really only had to purchase the tree bases.
Awesome.

So, what do you think?
Would you love to sit for hours and play with paper and glue?

December is always crazy busy for us...
but I will make sure you get to see my whole mantel...
and I've got a yummy treat to share if I don't run out of time!
Make sure you come back and see me soon!


Sharing here:

Modern Pilgrim
Just a Girl and Her Blog
The Blissful Bee
City Farmhouse
Pneumatic Addict
Lamberts Lately
Live Laugh Rowe
Ivy and Elephants
From My Front Porch to Yours
Glitter Glue and Paint
Horrific Knits
Saving 4 Six
Bloom Designs
What's Cooking Love?
Embracing Change
Sincerely, Paula
Living Well Spending Less
Nancherrow
AKA Design
Happy Blessed Home
The Golden Sycamore
Craft Dictator
The Answer is Chocolate
Crafts a la Mode
Love Bakes Good Cakes
Simply Sweet Home
The Freshman Cook
Redoux Interiors
The DIY Village
Dwellings
I Should Be Mopping The Floor
The Chicken Chick
Etcetorize
VMG206
Life on Lakeshore Drive
Huckleberry Love
Skip to My Lou
Sew Can Do
Sand and Sisal
Stone Gable
Love Grows Wild
A Stroll Thru Life
Funky Polkadot Giraffe
Home Stories A to Z
Upcycled Treasures
Fluster Buster
Savvy Southern Style
Bless'er House
Lolly Jane