Showing posts with label chocolate. Show all posts

Wednesday, June 11, 2014

Super Fudgy Mocha Almond Flourless Brownies


Howdy, howdy!
Did you miss me?
I know I've not been around much lately,
and I don't see it improving any time soon.
So, you'll have to accept these scrumptious treats as a consolation prize.
Mocha Almond Flourless Brownies.
Not a bad trade, huh?


We've just been so busy trying to get
stuff done around the house...inside and out.
In the summertime there are even more things that need done, you know?
I'm trying to get the finishing touches on the bathroom redo...
and there are only so many hours once I get home in the evening...


And Supergirl, Sara...she's got a fabulous internship with
the Colorado Ballet this summer, so we only see her on the weekends,
and we try to make the best of those.
So, as much as I love being here to share with you guys,
it just won't be as often until things slow down around here.


In the meantime...these are worth turning the oven on for...
They really are super fudgy and totally delectable!
You might just want to make a double batch
and hide half of  them in your secret stash.
Don't tell me you don't have one.
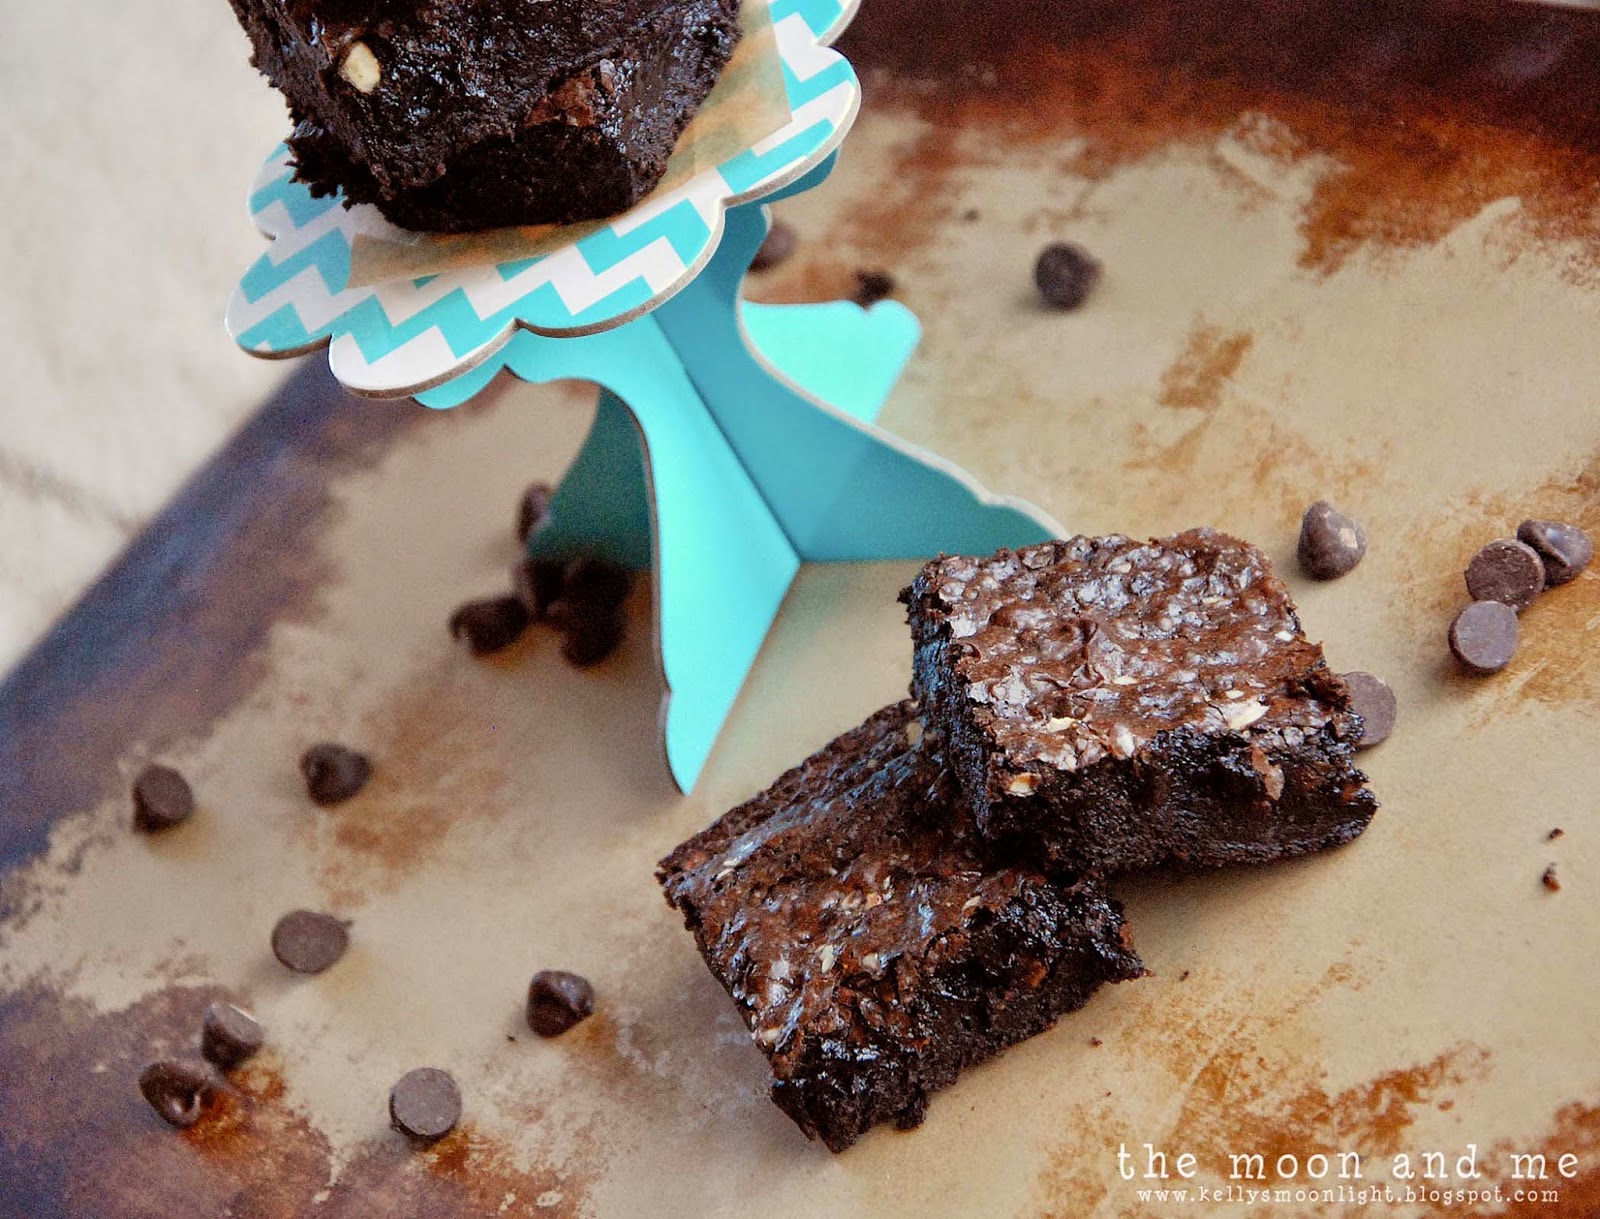

Mocha Almond Flourless Brownies
  • 1 cup chocolate pieces (dark or semisweet, morsels work great)
  • 1/2 cup coconut oil
  • 4 eggs
  • 1/2 cup white sugar
  • 1/2 cup brown sugar
  • 1/2 cup cocoa powder (I actually used 1/4 cup reg and 1/4 cup dark)
  • 1/2 cup almond meal or flour
  • 1/2 tsp salt
  • 1/2 tbsp espresso powder (or instant coffee if that's what you've got)
  • 2 tsp pure vanilla
  • 1/2 cup or more roasted almonds, chopped
  1. preheat oven to 350°
  2. melt the chocolate and coconut oil over medium heat
  3. whisk the eggs and sugar together until creamy, gradually stir in the melted chocolate
  4. stir in the almond meal, cocoa powder, espresso powder, salt, vanilla, and almonds
  5. pour into a well-greased or parchment-lined 8 X 8 baking pan
  6. bake at 350° for 20-25 minutes
  7. cool completely, cut and devour

They will almost seem as if they are not quite done,
because they are so moist and fudgy, don't be fooled.
Just eat 'em!

I hope you're having a stupendous week!
See you next time!


 Feeding the chocolate addiction here:

Thursday, March 27, 2014

Sara Bakes ~ Chocolate Overload Cookies

Howdy out there in blog-land!

Well...while Sara was home for spring break last week,
she decided to do a little baking.
on Pinterest and knew they would hit the chocolate spot!

I swear, I don't know what is up with these pictures!
They look fine on the computer, and then I load
them into Blogger and they look like this!
I even re-did them!
Grrrrr.


Anyway...you remember Sara, right?
This awesome girl...young lady...wo-man...?
Who am I kidding?
She'll always be my girl.
:)

She just used Averie's recipe and substituted what we had or whatever...you know?

This was actually the first time she's ever baked something from scratch all by herself.
She was pretty proud of these cookies.
By the time I got around to snapping a couple pictures...
These two were all that were left!


Averie's pictures with the gooey chocolate
must have been straight out of the oven.
So Sara's don't look so messy...
Here's the recipe link again...it isn't right for me to post it
here when the subs she made are not significant.
We only had regular butter...dark brown sugar...
and not quite enough dark chocolate, so she just used extra semi-sweet.

Sara made her cookie balls quite a bit smaller and got about
3 1/2 dozen as opposed to the 17 in the original recipe.
She baked them the same, but could easily have cut a minute or two off that time.


They were still soft and chewy, and yummily chocolicious...
but surprisingly not overly so...

She gave most of them away...which was probably for the best.
Otherwise we might have sat and eaten them all with a tall glass of cold milk.
In one sitting.

What's the last Pinterest recipe you tried?
Was it any good?
Let me know!

P.S. I really am working on things...I've finally started
on that hall bathroom that I bought the paint for eons ago...

I'm trying to get the stuff hung on the walls before
I show you the entertainment center makeover...
can't have it sitting in a plain jane room now can we?

So...until then...
smooches!


Sharing here:

Thursday, February 20, 2014

Gluten Free Chocolate Cupcakes with Peanut Butter Frosting

Howdy, howdy!
I told you I had sweet treats in store for you!

Remember once I told you I had a friend with gluten issues?
Well, it was his birthday recently...
and we were headed to their house for Bible study...
and I couldn't very well show up empty handed, now could I?

So...I took some of these babies...and we all chowed down!


They're dark and moist.
Chocolatey and peanut buttery and oh so utterly...
good.


Actually, if you want to know the real truth...
while the cupcakes were pretty good...
I threatened to lick the frosting off of every last one...


Seriously...it was THAT good!
Oh my...I could eat it all day long with a spoon!
Or at least until I made myself sick.


It was the first time I'd made a peanut butter buttercream
and I can tell you...it certainly won't be the last!
The cupcakes were good, but the frosting makes all the difference!


Gluten Free Chocolate Cupcakes
  • 1 1/2 cups GF All Purpose Baking Flour {from Bob's Red Mill}
  • 2 tbsp corn starch
  • 1 cup brown sugar
  • 1/2 cup white sugar
  • 1/2 cup PLUS 2 tsp unsweetened cocoa powder
  • 1 tbsp baking powder
  • 1 tsp xanthan gum
  • 3/4 tsp sea salt
  • 1/3 cup butter, softened at room temp.
  • 1/4 cup vegetable oil
  • 1 large egg
  • 1 tsp pure vanilla
  • 1 cup warm brewed coffee
  • 1 tsp cider vinegar
  • 1/2 cup mini chocolate chips
  1. Preheat oven to 325°F. Place cupcake liners into muffin tins...you'll need 24.
  2. Mix all dry ingredients together in a large bowl. 
  3. Add butter, oil, egg, and vanilla. Mix until the batter has a crumbly texture.
  4.  Slowly add coffee and vinegar.  Beat at medium speed for 2 minutes.
  5. Fold in chocolate chips.
  6. Fill cupcake liners about 1/2 to 2/3 full...you really should get 24. :)
  7. Bake for about 20 minutes...until they spring back when gently touched.
  8. Remove from oven and cool completely on a rack
{This is basically the recipe from Bob's...
I added the chocolate chips because...well, why not?
And I adjusted the temp and baking time for cupcakes.}


Peanut Butter Buttercream Frosting
  • 1 cup {2 sticks} butter, softened at room temp.
  • 1 cup creamy peanut butter
  • 1 tsp pure vanilla
  • 3-4 cups powdered sugar
  1. Cream butter until smooth.  Add vanilla and peanut butter and beat until creamy.
  2. Add 2 cups of powdered sugar, then gradually add more until you reach your desired consistency.
If you want to be able to pipe it, make sure it's firm enough to hold up. 
Use a large open star tip and swirl it on.
Sprinkle some extra mini chocolate chips on top for extra goodness.


My friend was thrilled!
He doesn't get home made GF goodies very often.
I think he may have swooned a little. :)

I took the extras to work and everyone loved them there, too!
{especially the frosting...hee hee}

We've gotten a little reprieve from winter around here for a few days.
It's been sooooo nice!
I hope the same is true for you guys
and that you have a fantastic weekend!

Very soon, I hope to be able to show you what
we did to our old TV entertainment center.
You wouldn't even  recognize it!
Until then...


Handing out spoons {for frosting!} here:

Tuesday, June 18, 2013

Caramel Mocha Mini Bundt Cakes


Or maybe a better title would be:
My Misadventures In Baking

Seriously.

I started out to make this cake from Inside BruCrew Life...
for Father's Day and ran in to trouble right from the start.

Well, I guess the trouble didn't start right away.
Like, I KNEW I didn't have plain yogurt.
No biggie.

  
I used sour cream.
I make all my cakes with sour cream so I
wasn't the least bit worried about this part.
{if you click that link you can see most of my cakes}

I used vanilla pudding instead of chocolate because that's
what I had and didn't want to make a special trip.
You know how it is.

All was well and good.
Or so I thought.

I went to the baker's rack to get my fluted stoneware pan...
it was cracked.
Big crack.  How the heck did that get there?
{insert BIG sad face here}

At least they still make them...
SO...I had to do the next best thing...
use the mini fluted stoneware pan that's
been gathering dust in the cupboard.


Moving on...
Everything seemed to be going smoothly,
until it was time to add the oil.

Where did it go? Is it hiding?
I could have sworn I saw a bottle in the cabinet the other day.
Either that or the pancake syrup was playing tricks on me.

We mainly cook with olive oil and I didn't want to use that.
So I substituted melted butter.

I couldn't get my white chocolate to
melt properly...it kept getting lumpy.

Oh.My.Goodness.

But, just so you know...
it turned out DELICIOUS!!!!!


So, here are the adaptions I made to the original recipe:

Ingredients:

  • 1 chocolate cake mix (I use Betty Crocker's Triple Chocolate Fudge ~ THEEEE Best!!!)
  • 1 instant chocolate {or vanilla} pudding mix (or whatever flavor you want)
  • 1 cup sour cream
  • 4 eggs
  • 1 stick butter, mostly melted
  • 1 cup brewed coffee, cooled
  • 1 cup mini chocolate chips (optional if you use the above cake mix)


I interrupt this regularly scheduled blog post for a sweet tooth service announcement:


See this naked can?
Did you know it's super easy to make caramel sauce?


Grab a can of sweetened condensed milk
{I'm a snob and only buy Eagle brand}
Remove the label...place can in pot of hot water, enough to cover it,
bring to a boil and simmer about 2 hours.
Add more water as needed to keep covered.


When the time is up, let it cool...you don't wan't to get burned.
This is what you'll see when you remove the lid.
A whole bunch of gooey caramel awesomeness.

Make several and keep them in the cupboard...
ready when you need it.
{P.S. it is unbelievable with apple slices!}

You're welcome.


Topping: 
  • 1/2 cup milk chocolate chips
  • 1/2 teaspoon shortening
  • 1/2 cup caramel {you can warm it in the microwave a little so it's drizzly}
  • coarse sea salt, optional


Instructions
  1. In a mixing bowl, combine the cake mix, pudding mix, sour cream, eggs, butter, and cooled coffee. Beat on low for 1 minute, scrape sides then beat 2 minutes on medium. Stir in the chocolate chips.
  2. Since I had a mini fluted stone, I used that (with some batter to spare in cupcake wrappers), but you could also pour into a greased 10" bundt pan.
  3. Bake the minis at 350° for 40-45 minutes or the full size for 50-55 minutes. Let cool 15 minutes in the pan. Place a plate over the top of the cake and flip the cake over. Let cool completely...or not.
  4. Melt the chocolate chips and shortening in the microwave. Heat for 30 seconds. Stir until creamy. Place in a plastic baggie and cut one tip off. Drizzle over the top of the cake. {awesome tip} 
  5. Warm the caramel in the microwave until thin enough to pour...about 30 seconds. Drizzle the caramel over the chocolate. Sprinkle the top with the sea salt if desired. Store in a sealed container.

 I still want to make Jocelyn's version because it looks soooo fudgy.