Showing posts with label gluten free. Show all posts

Tuesday, January 13, 2015

Happy New Year! 2014's Top Ten!


Okay, well, I'm only slightly behind.
I mean, January's not quite half over yet, right?

It has been super crazy nuts around here the last few weeks.
So, without further ado,
allow me to present to you the top 10 from 2014!!!

I know, I know...
you're thinking...didn't I only post ten times last year?
No...I actually did a few more than that!
:)


As always, I feel these numbers would be totally
different if posted at different times of the year.


9. Taking you into the clouds in my Valentine's "heart-air" balloon.
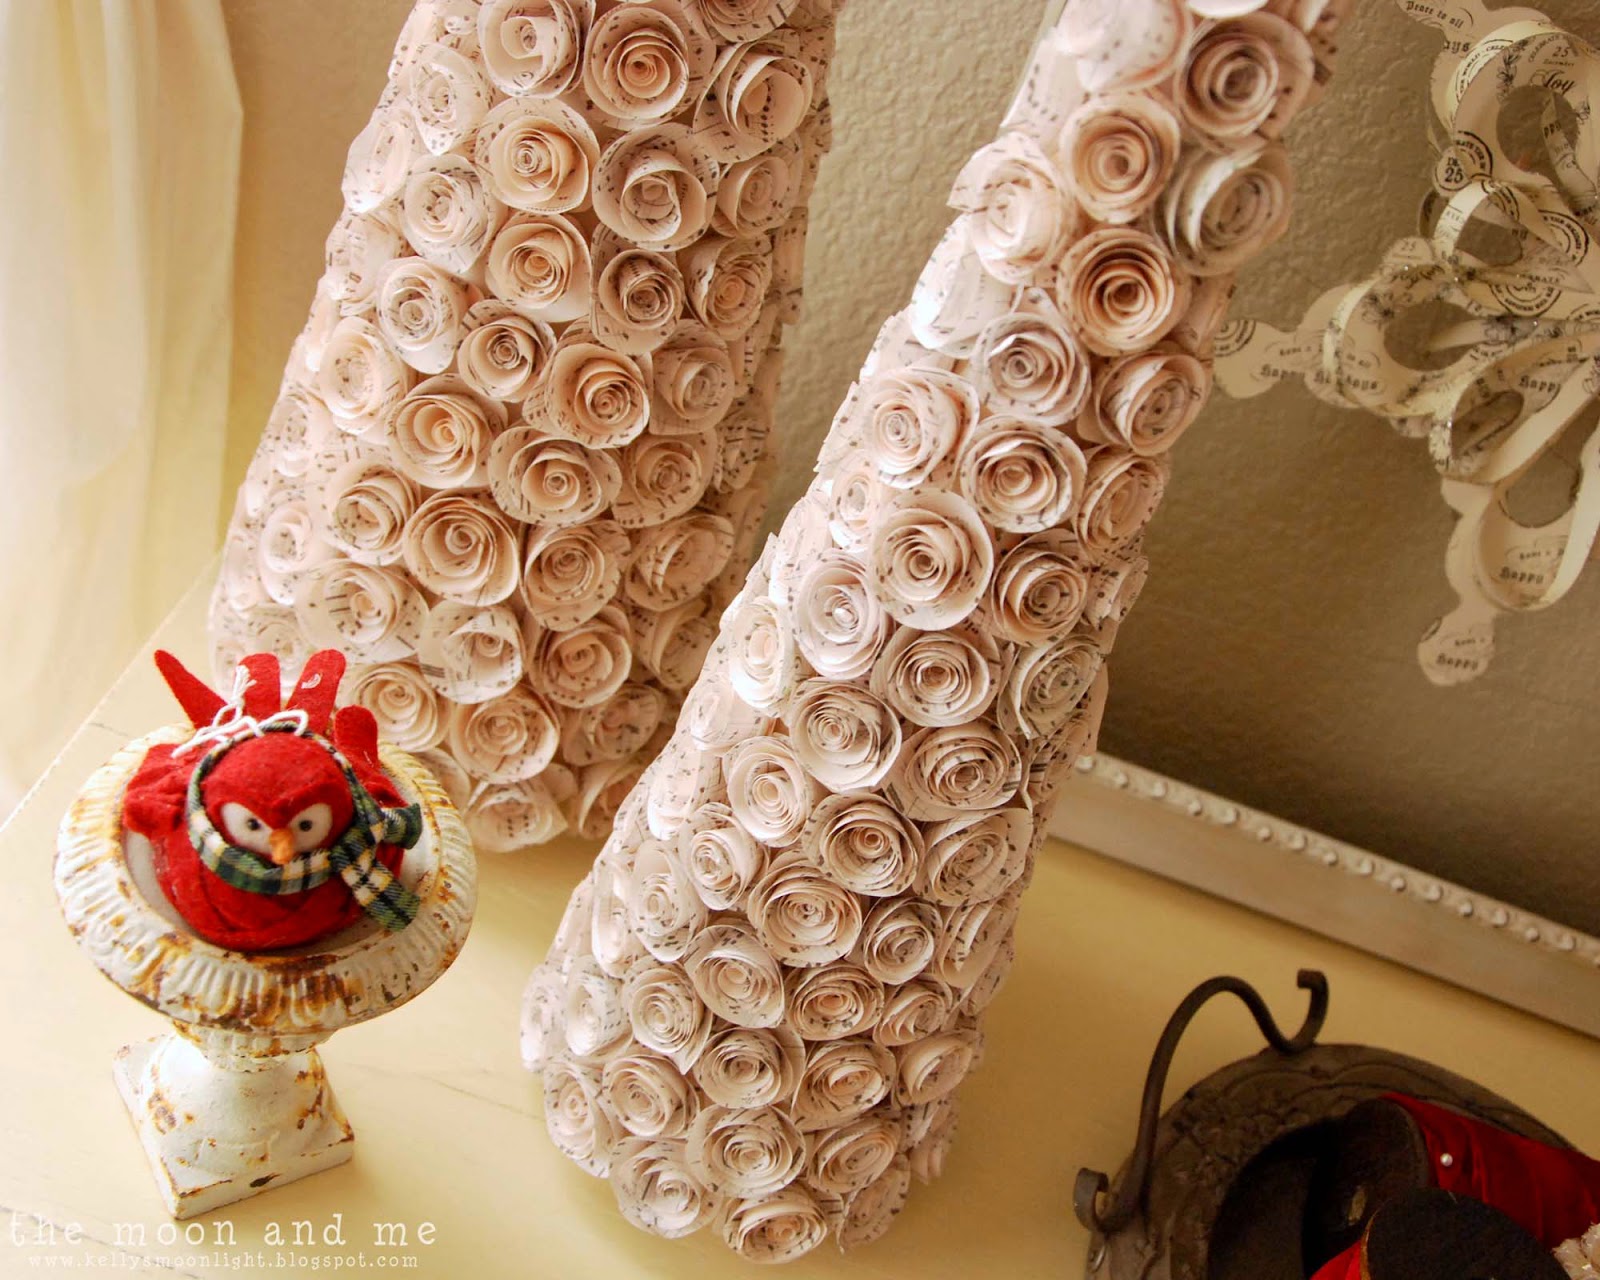

8. Absolutely wonderful and totally time consuming Paper Rose Trees.


7.  The "I still love going in there just to look" Planked wall bathroom.


6. The "keep calm and eat breakfast" Cheesy Egg and Sausage Bake.


5. "I can't believe I ate all the frosting" GF Chocolate Cupcakes with Peanut Butter Frosting.


4. The secret makeover of Sara's purple palace.


3. The Chalk Painted Dresser of my dreams.


2. The great TV Console maker
and the single most popular post from last year...


The super easy customizable DIY personalized cutting board.

And there you have it!
I had lots of fun in 2014 doing all these projects...
I hope you enjoyed them, too!

2015 looks to be challenging for my blogging time.
I just changed jobs and have much less free time now...
although I am totally stoked for this new adventure in the new year.

I know I promised a sweet treat before Christmas...
I am hoping to get it out to you in time for Valentine's day.

Until then, keep smiling!


Sharing here:

Craft Dictator
AKA Design
Crafts a la Mode
I Heart Naptime
The 36th Avenue
Reasons to Skip the Housework
I Should Be Mopping The Floor
The Chicken Chick

Wednesday, June 11, 2014

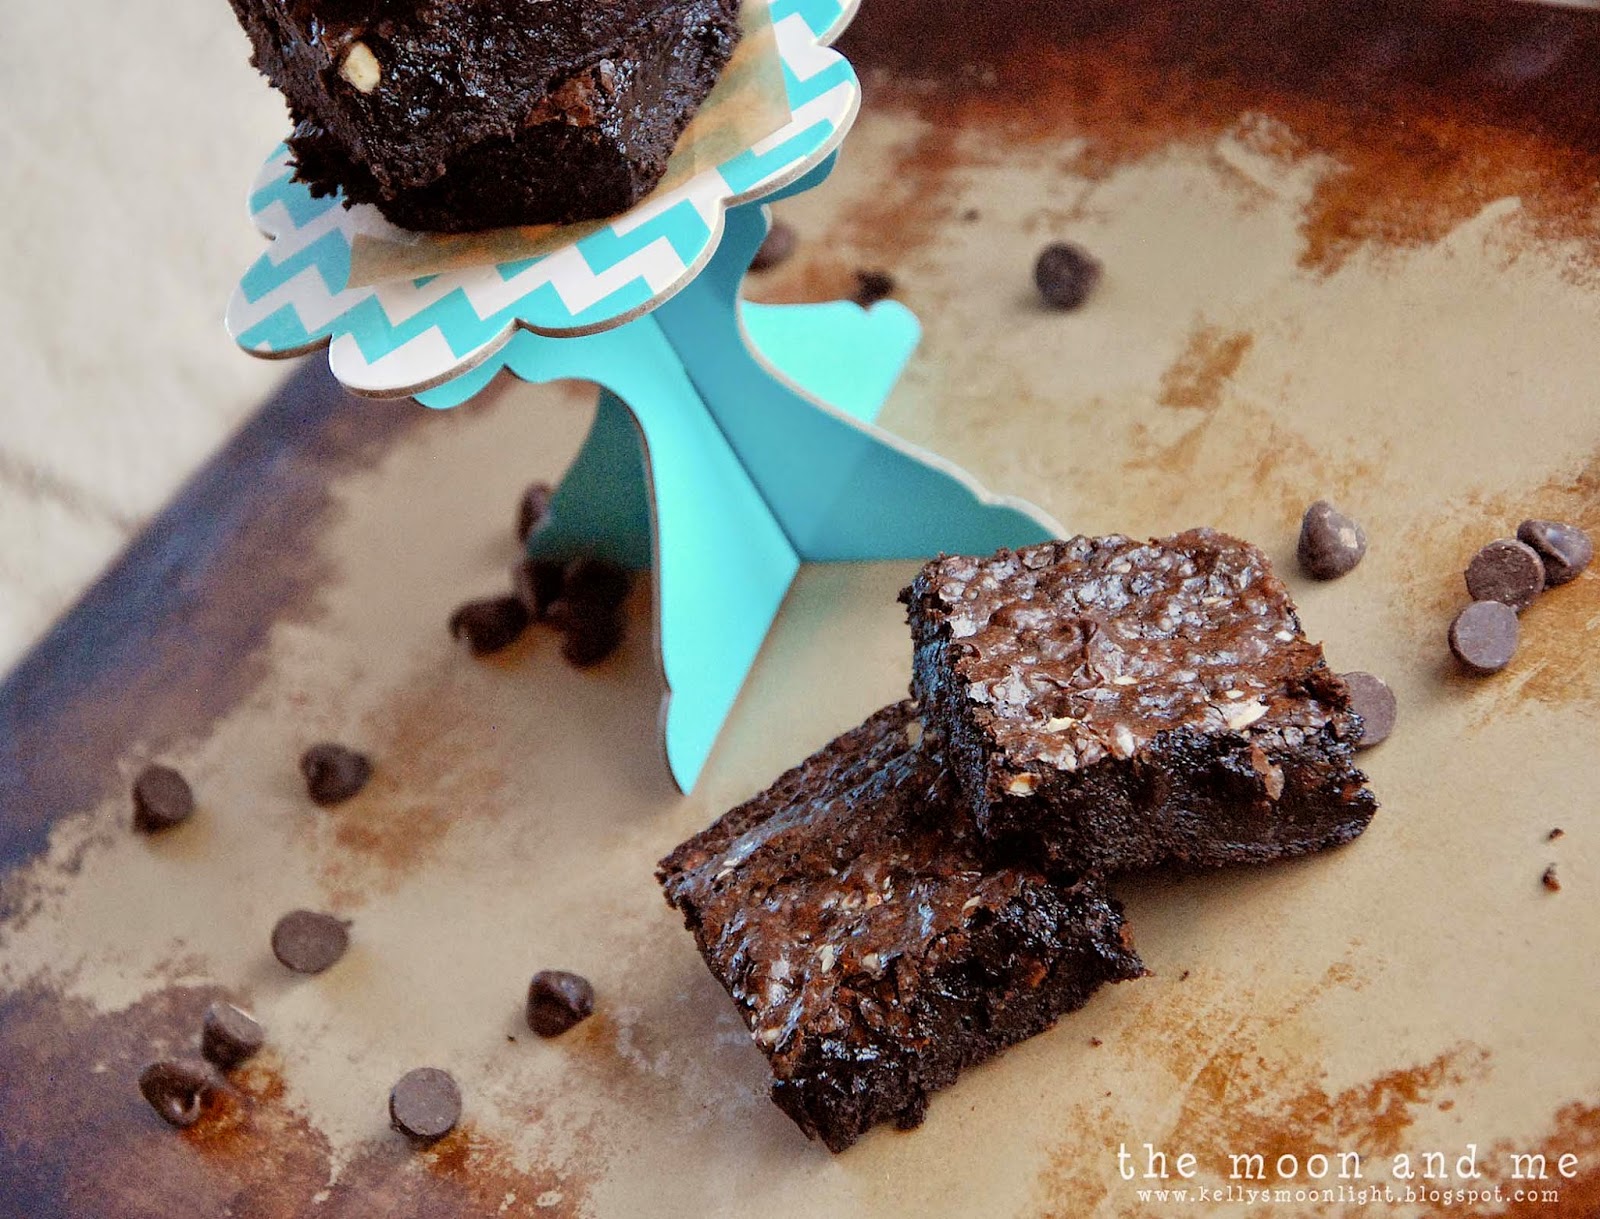
Super Fudgy Mocha Almond Flourless Brownies


Howdy, howdy!
Did you miss me?
I know I've not been around much lately,
and I don't see it improving any time soon.
So, you'll have to accept these scrumptious treats as a consolation prize.
Mocha Almond Flourless Brownies.
Not a bad trade, huh?


We've just been so busy trying to get
stuff done around the house...inside and out.
In the summertime there are even more things that need done, you know?
I'm trying to get the finishing touches on the bathroom redo...
and there are only so many hours once I get home in the evening...


And Supergirl, Sara...she's got a fabulous internship with
the Colorado Ballet this summer, so we only see her on the weekends,
and we try to make the best of those.
So, as much as I love being here to share with you guys,
it just won't be as often until things slow down around here.


In the meantime...these are worth turning the oven on for...
They really are super fudgy and totally delectable!
You might just want to make a double batch
and hide half of  them in your secret stash.
Don't tell me you don't have one.


Mocha Almond Flourless Brownies
  • 1 cup chocolate pieces (dark or semisweet, morsels work great)
  • 1/2 cup coconut oil
  • 4 eggs
  • 1/2 cup white sugar
  • 1/2 cup brown sugar
  • 1/2 cup cocoa powder (I actually used 1/4 cup reg and 1/4 cup dark)
  • 1/2 cup almond meal or flour
  • 1/2 tsp salt
  • 1/2 tbsp espresso powder (or instant coffee if that's what you've got)
  • 2 tsp pure vanilla
  • 1/2 cup or more roasted almonds, chopped
  1. preheat oven to 350°
  2. melt the chocolate and coconut oil over medium heat
  3. whisk the eggs and sugar together until creamy, gradually stir in the melted chocolate
  4. stir in the almond meal, cocoa powder, espresso powder, salt, vanilla, and almonds
  5. pour into a well-greased or parchment-lined 8 X 8 baking pan
  6. bake at 350° for 20-25 minutes
  7. cool completely, cut and devour

They will almost seem as if they are not quite done,
because they are so moist and fudgy, don't be fooled.
Just eat 'em!

I hope you're having a stupendous week!
See you next time!


 Feeding the chocolate addiction here:

Friday, April 4, 2014

Crustless Cheesy Egg and Sausage Bake

Super easy, nice & cheesy...
glad that doesn't describe me!
Hee hee.

But seriously...
I've had this recipe in my binder for ages...
we use it all the time!

I cook once, we eat breakfast for days!
What's easier than that?


And it's loaded with good stuff, Maynard!

Sausage and mushrooms...


bright green onions...


blurry, sweet, red tomatoes...


wholesome, fresh eggs...


lovingly blended with some creamy cream and spices!


layer it all up...with some of that cheesy cheese...


and pour some eggs on me...
or rather on my breakfast!!!


give it a little shake...the pan, not your booty...
unless you really wanna...


bake to golden perfection...


slice it up...and chow it down!


We cut this into eight equal pieces.
That's 1 1/2 eggs per serving plus sausage, cheese, and veggies.

Since there are only two of us, we have
a ready made breakfast for four days!

My husband loves that plan...
since he's usually the breakfast-maker. :)

And since he IS the breakfast-maker...
this makes it super simple for me when he's out of town for work...
I just toss a piece in the microwave and I'm not trying to
find time to pull breakfast together before work!
Awesomesauce!


This also works great for a brunch buffet...
and since it's totally delicious...it's always a big hit!
I would just cut it into 12 pieces, I think.

Crustless Cheesy Egg and Sausage Bake
  • 1 lb breakfast sausage, browned and crumbled
  • 1 cup chopped mushrooms
  • 1/2 cup sliced green onions
  • 1 large tomato, diced - or the equivalent in yummy cherry tomatoes, quartered
  • 8 oz shredded cheese, I love sharp cheddar, but use what YOU love
  • 12 eggs
  • 1 cup heavy cream  (I actually use 1/2 cup cream and 1/2 cup half & half   -   does that make it 3/4 & 1/4?)
  • 1/2 tsp Italian herb seasoning
  • 1/2 tsp salt
  • ground pepper to your liking
  • sometimes when I'm feeling adventurous, I add a sprinkle of crushed red pepper!

  1. Cook sausage and crumble, when almost done, stir in chopped mushrooms so they can cook for a couple minutes.  Spread it all into a well greased or "Pammed" 13 X 9 baking pan.
  2. Evenly sprinkle the green onions, then the tomatoes, then the cheese over the meat.
  3. Crack your eggs into a mixing bowl, beat with a fork.  Add in cream and seasonings.  Beat with fork until well combined.
  4. Pour egg mixture evenly over layers.
  5. Bake at 350° for 35 minutes...or until set...it begins to get golden around the edges.
  6. If serving right away, allow to sit for 10 minutes or so...otherwise, set on a rack until cool, cut into desired pieces, cover with aluminum foil and place in fridge.
  7. Warm it slowly in the microwave and enjoy!

This is low carb and since it doesn't have a crust...technically gluten free!
It's totally yummy and good for Atkins...
Easy and convenient on busy mornings.
What's not to love?
C'mon...give it a try!

In other news...
I have actually started on that bathroom makeover
that I bought the paint for a year while ago.

The bad news? 
I'm not sure I'm still lovin' the paint choice I made.
Oops.
Now what?
:)
Aaahhh...my decorating misadventures...
the continuing saga...

Have a great one!


p.s.  why does blogger hate ampersands?

Breaking the fast at these fine parties:

Thursday, February 20, 2014

Gluten Free Chocolate Cupcakes with Peanut Butter Frosting

Howdy, howdy!
I told you I had sweet treats in store for you!

Remember once I told you I had a friend with gluten issues?
Well, it was his birthday recently...
and we were headed to their house for Bible study...
and I couldn't very well show up empty handed, now could I?

So...I took some of these babies...and we all chowed down!


They're dark and moist.
Chocolatey and peanut buttery and oh so utterly...
good.


Actually, if you want to know the real truth...
while the cupcakes were pretty good...
I threatened to lick the frosting off of every last one...


Seriously...it was THAT good!
Oh my...I could eat it all day long with a spoon!
Or at least until I made myself sick.


It was the first time I'd made a peanut butter buttercream
and I can tell you...it certainly won't be the last!
The cupcakes were good, but the frosting makes all the difference!


Gluten Free Chocolate Cupcakes
  • 1 1/2 cups GF All Purpose Baking Flour {from Bob's Red Mill}
  • 2 tbsp corn starch
  • 1 cup brown sugar
  • 1/2 cup white sugar
  • 1/2 cup PLUS 2 tsp unsweetened cocoa powder
  • 1 tbsp baking powder
  • 1 tsp xanthan gum
  • 3/4 tsp sea salt
  • 1/3 cup butter, softened at room temp.
  • 1/4 cup vegetable oil
  • 1 large egg
  • 1 tsp pure vanilla
  • 1 cup warm brewed coffee
  • 1 tsp cider vinegar
  • 1/2 cup mini chocolate chips
  1. Preheat oven to 325°F. Place cupcake liners into muffin tins...you'll need 24.
  2. Mix all dry ingredients together in a large bowl. 
  3. Add butter, oil, egg, and vanilla. Mix until the batter has a crumbly texture.
  4.  Slowly add coffee and vinegar.  Beat at medium speed for 2 minutes.
  5. Fold in chocolate chips.
  6. Fill cupcake liners about 1/2 to 2/3 full...you really should get 24. :)
  7. Bake for about 20 minutes...until they spring back when gently touched.
  8. Remove from oven and cool completely on a rack
{This is basically the recipe from Bob's...
I added the chocolate chips because...well, why not?
And I adjusted the temp and baking time for cupcakes.}


Peanut Butter Buttercream Frosting
  • 1 cup {2 sticks} butter, softened at room temp.
  • 1 cup creamy peanut butter
  • 1 tsp pure vanilla
  • 3-4 cups powdered sugar
  1. Cream butter until smooth.  Add vanilla and peanut butter and beat until creamy.
  2. Add 2 cups of powdered sugar, then gradually add more until you reach your desired consistency.
If you want to be able to pipe it, make sure it's firm enough to hold up. 
Use a large open star tip and swirl it on.
Sprinkle some extra mini chocolate chips on top for extra goodness.


My friend was thrilled!
He doesn't get home made GF goodies very often.
I think he may have swooned a little. :)

I took the extras to work and everyone loved them there, too!
{especially the frosting...hee hee}

We've gotten a little reprieve from winter around here for a few days.
It's been sooooo nice!
I hope the same is true for you guys
and that you have a fantastic weekend!

Very soon, I hope to be able to show you what
we did to our old TV entertainment center.
You wouldn't even  recognize it!
Until then...


Handing out spoons {for frosting!} here:

Wednesday, January 8, 2014

Spicy Pork & Kale Soup


Whew...old man winter has been in a foul mood lately!
Which means it's definitely time for SOUP!

This one oughta warm the cockles of his old heart. 


Spicy pork and kale soup with rice noodles.

Oh.My.Goodness.
I loved this soup and can't wait to make it again.
Even if it did make my nose run and my face hot!


Spicy Pork and Kale Soup
  • 1 lb. ground pork
  • 1/3 cup diced onion
  • 5 or so cloves minced garlic, more if you like!
  • 2 tsp grated ginger (I use the paste you can get in the produce department)
  • 1 - 2 tsp. crushed red pepper (depending on the heat you want ~ I used 2 ~ hence the runny nose)
  • 1/2 tsp ground cumin
  • olive oil (optional)
  • salt and pepper to taste
  • 8 cups chicken broth
  • 8 cups torn kale (packed down)
  • 3 - 4 oz flat wide rice noodles
  • 1 cube knorr chicken bouillon as shown below (or 2 cubes other~but this is my fave!)
 

  1. Cook pork, onions, garlic, ginger, red pepper, and cumin in a large pot with a bit of olive oil.
  2. Break meat up with a spoon so it's crumbly, but not too crumbly.
  3. Add some salt and pepper to taste.
  4. Cook until meat is browned and onions are cooked...about 10 minutes.
  5. Add broth and bring to a boil...reduce heat and simmer about 10 minutes.
  6. This lets all the flavors get to know each other...good time to see if you need salt and pepper.
  7. Add the torn up kale and the rice noodles.
  8. Continue simmering while the noodles cook, about 8 minutes.
  9. Serve immediately and keep the tissues handy!


I warmed up leftovers for lunch and was in love all over again.
If you like a little spice in your life...give it a try!

It'll help thaw you out after shoveling all that snow!
Maybe we should give some to old man winter!

Some good things coming in 2014 so stay tuned!

Have a spicy week!


Ladling up soupy goodness here:

This Silly Girl's Life
Ella Claire Inspired
Embracing Change
From My Front Porch to Yours
Ivy and Elephants
Lamberts Lately
Live Laugh Rowe
Put A Bird On It
Saving 4 Six
Carole's Chatter
Budget Girl
Crafts a la Mode
Craft Dictator
Love of Family and Home
Whipperberry
Horrific Knits
Lil' Luna
Cheerios and Lattes
Made From Pinterest
Serenity You
I Should Be Mopping The Floor
The Plaid and Paisley Kitchen
Dwellings
 The Dedicated House
Stone Gable
A Stroll Thru Life
My Uncommon Slice of Suburbia
Love Grows Wild
Anyonita Nibbles
A Peek Into My Paradise

Friday, May 17, 2013

Pink Poker Night ~ Girls' Night In

Looking for a fabulously fun night with all your BFFs?
Host a pink poker night!

A couple of weeks ago we had a girls' night in at my house.
I decided to do pink poker night cuz it sounded fun.

Not that I'm a great card player.
On the contrary...I just make up the rules. :)


I found this kit on Amazon.
But you don't need it...just find some pink poker chips and cards.
Bicycle brand has several pink card versions.
I got these chips on Ebay.

Don't forget all the frills...
tiaras and feather boas are a must!
Make sure everyone gets in the spirit!

The box kit included invitations, but those would be simple to make.
It also suggested having everyone bring one fun item
to make up a "bling" pot for the last hand.
You could make it whatever you wanted.


Oh, and if you just happen to have some pink
spray painted folding chairs, be sure to use 'em!


Striped straws...don't they make you smile?
I actually found these in the party aisle at Hobby Lobby for about $3.
Oh, that's where the tiaras came from, too.


Of course you need some fabulous finger food...

Below are some peanut butter pretzels
drizzled with pink white chocolate.
Does that even make sense?


We had some pink sangria, but I was having so much
fun, I forgot to take any pictures of that...or of
anyone enjoying the party for that matter.

Oh well...I guess having fun was the bigger priority. :)


The sangria was delicious and easy!
1 - 2 liter bottle of 7up Zero
1 - bottle white zinfandel
1 - bottle white cranberry strawberry juice
sliced oranges to float in the pitcher
All chilled and mixed together
SoOoOo yummy and refreshing!

Even if your sister dumps a whole glass on her chair...
and doesn't at least use a straw to suck up what she can.


Oh, look...there's one cookie left for me.

My mom showed up with these beautiful roses.
Love her. :)


We had all sorts of other finger foods, some store bought.
No need to tire yourself out getting ready!

You need to save your energy for all the laughing
and carrying on that's sure to happen.
{shrimp cocktail is easy and hey, it's PINK!}
I'm also thinking...watermelon,
strawberries, pink lemonade...


It was so much fun and definitely what everyone needed.
A whole night of just us girls with a whole bunch
of laughing and goofy shenanigans!
But I have one little confession to make...

We never actually got around to playing poker!
We were having too much fun NOT playing.
:)
The next day I got texts or emails from everyone
thanking me for such a fun night!
I said next time, we won't even pretend we're gonna play.

Does this sound like a great time to you?
Check out the Pink Poker Night Pinterest board I started.

 If you host a pink party, send me pics...
since I forgot to take my own.
Ha!