Showing posts with label in the kitchen. Show all posts

Saturday, December 16, 2017

A Christmas Breakfast Gift Basket

Who doesn't love breakfast?
With just a few fun and quick-to-put-together items you
can warm the cockles of someone's breakfast-loving heart!

Once upon a Christmas we had a fabulous neighbor
help us out with something a little challenging.
To thank them I put together this breakfast gift basket.

It was pretty simple and fun to do.


I picked up most of the non-food items at HomeGoods or TJMaxx.

Start with some really cute Christmas plates.
There are four in this set packaged in a nice box.
Sorry I didn't take a picture of them alone.


Pile in the goodies.
I've thrown in some maple syrup sporting a Santa hat.

Next add some ready-to-mix pancakes in a mason jar.
I can't remember which recipe I used, this one or this one...
but I'm leaning toward the one that adds butter.
Because butter makes it better, right?  Right.

Just mix up the dry ingredients and add a tag for
the instructions to add the wet ingredients.
If you want to deliver the whole package...
include some milk, eggs, and butter in the basket.


My basket also included a bag of Christmas Cappuccino mix...
perfect for chilly mornings...or evenings...or lazy afternoons!

If you can, add in a jar of homemade jam...this one's peach.


Stick some cute labels to the tops of your mason jars.
Make it festive!


Tuck it all in a basket with some tissue,
or as I have here, a snowflake canvas bin.
Add a fun dish towel - which may or may not ask a dubious question - and
some absolutely necessary red and green striped straws!


And there you have it...
A fun and easy gift you can throw together at almost the last minute.

Now, I just have to ask you...
Have YOU been naughty or nice?

I refuse to answer that question on the
grounds it may tend to incriminate me.


At any rate...
I hope you and your family have a wonderfully magical
Christmas surrounded by love and joy and the peace of the baby born in Bethlehem.


Saturday, September 19, 2015

Easy Yummy Crockpot Chicken Soup


I think I see fall coming!
Yippee!!!

That means time for sweaters and cozy bonfires and changing leaves...and SOUP!

Don't get me wrong...I'm NOT ready for what comes after fall...ugh.
For now let's just stick to soup.

Once upon a time I posted about my world famous chicken soup...
I've been meaning to revisit that...it seriously is super good...
you just have to add a little more broth to make it soupier.


This is a variation of that recipe that you can do in the crockpot.
What's not to love about that?

This time I used fresh cut carrots and onions...
well...because that's what I had.
It was worth it and I'd do it again.


I did still throw in a packet of Knorr vegetable soup mix.
It just adds a little oomph.


You need a BUNCH of chicken broth.
A bunch.
Oh...and chicken.
Put it all in your crockpot with some seasonings...


After the chicken is completely cooked, you could take it
out and let it cool and tear it up or cut it into bite-sized pieces...
or you could use a handy-dandy mix 'n masher and just tear it up right in the pot.
Yup. Much easier.


See?


When you've decided it's just about ready,
throw in a couple cups of noodles and let them cook.


Then you're ready to enjoy some seriously good chicken soup.
Seriously.


Totally Yummy, Seriously Easy Crockpot Chicken Soup
  • 3 large boneless skinless breasts, about 1 1/2 - 2 lbs
  • 1 medium onion, chopped
  • 1 1/2 - 2 cups carrots, peeled and sliced and diced
  • 5 - 6 cloves garlic, minced or pressed (I use the jar kind and used a tbsp or so...I like garlic)
  • 2 - 3 tbsp olive oil
  • 1 tsp paprika
  • 1 tsp dried thyme
  • 1 bay leaf
  • 1 packet dry Knorr vegetable recipe mix
  • 1 square Knorr Caldo de Pollo bouillon
  • 8 cups (64 oz) chicken broth
  • about 1 tsp salt, and ground pepper to taste
  • 2 cups egg noodles (I used the old fashioned style) or 1 cup rice

  1. Place chicken breasts in crock pot.  Top with chopped onions and carrots.  Add garlic, olive oil, and spices.
  2. Pour in chicken broth. Stir in soup mix.  Add salt and pepper.
  3. Cook on high for 4-6 hours or low about 8 hours until the chicken is cooked and the veggies are soft.
  4. Once the chicken is cooked, shred in the pot or remove and cut up.
  5. Add noodles (or rice) and cook until soft then turn off heat to prevent mushy noodles.


Relish the cooler weather.
Make some soup.
Enjoy it immensely.
You're welcome.


Monday, February 2, 2015

Grandma's Butter Caramels

Hello, strangers.

How's your new year going so far?
I hope it's been great...sorry for you east coast folks...
I know the weather has been making life miserable.

Here's something to keep you busy and give
you something to satisfy your sweet tooth!

Homemade butter caramels.
They are soooooo amazingly delicious!
You'll hide them in your coat pocket so you can find them one afternoon
when you think they're all gone so you can have a sweet surprise!
Oh, wait...maybe that's just me.


These tasty caramels are part of the legacy that is my mother-in-law.
She passed away this past summer after a long battle with cancer.
This post is a tribute to her.

It was 16 years from her initial diagnosis to her death...
and let me tell you, she filled those 16 years with as much life as she could.
She traveled, she had good times with friends and family,
she spoiled her only granddaughter,
and just over 6 years ago she married a good man.
Who says you can't find love later in life?


She was tough, she was a fighter...but she was good-hearted and generous.
Did we always see eye to eye?
Of course not, we're family after all.
But we agreed on the tremendous love we had for her son, my husband,
and her granddaughter, our daughter, Sara.
She raised a son into a wonderful man whom I love more than
anything and I will forever be grateful to this woman.


Okay...on to the sugar.
You'll need a candy thermometer to gauge the temperature so
you don't end up with runny or rock hard candy.


I used a Pampered Chef silicone spatula to stir because they have a high heat tolerance.
You'll also need extra arms, because you'll be stirring and
stirring and stirring until you think the arms you have will fall off!


See? An action shot...of the incessant stirring...


Ahead of time, you'll want to prepare your cookie sheet or baking sheet for cooling.
I used a cookie sheet and lined it with parchment which
I also buttered so the caramel wouldn't stick.


Once they're cool, turn them out onto a large cutting board and use a heavy,
sharp knife to cut them to the size and shape you want.

Be careful.
Caramel is rather hard and you'll be using a lot of pressure on the knife to cut it.
I wouldn't want any of you to injure yourself in the name of sweets.


My MIL used wax paper squares to wrap her caramels.
I don't buy wax paper, so I have always used parchment squares.
The parchment I purchase has a silicone
coating so it works similar to the wax paper.


If you use a smaller pan to cool them, you'll get fatter caramels.
I kinda like them flatter...to me they're easier to bite...
but that's totally up to you.


You will have to excuse the Christmas tree and packaging.
I had fully intended to get this out to you in time for gift giving.


However, life gets in the way sometimes and we just have to adjust our sails.
So...just pretend these take-out boxes really have hearts
on them and give them away for Valentine's Day!


I asked her one time if this was a secret family recipe because I wanted to share it.
She laughed and said she had found it in some magazine
she could no longer remember and thought they sounded good.
She'd been making them every holiday season
since and loved to give them as gifts.

My husband's cousin's wife (got that?) got the recipe from
me in December so she could make some to take to Christmas dinner.
It was a heart-felt gesture and a wonderful surprise to her MIL,
my MIL's sister, and my MIL's husband.
They were very touched by her thoughtfulness.

A legacy of sweetness.


Grandmas Butter Caramels
  • 1 lb real butter
  • 2 ¼ cups packed brown sugar (I used dark, she used regular)
  • 1 cup Karo syrup
  • 1 can sweetened condensed milk
  • ½ cup chopped walnuts (optional)
  • 1 tsp pure vanilla
  1. Mix all but vanilla in a heavy saucepan. Bring to a boil, stirring constantly.
  2. Continue to stir and stir and stir until mixture reaches 243° on a candy thermometer.
  3. Remove from heat, add vanilla, mix well.
  4. Pour onto a well-buttered cookie sheet or baking pan, spread evenly.
  5. Let cool; cut into squares or rectangles, or whatever your heart desires.
  6. Wrap in wax paper or parchment squares.
  7. Indulge often.

Make some caramels.
Hug the ones you love.

Tuesday, January 13, 2015

Happy New Year! 2014's Top Ten!


Okay, well, I'm only slightly behind.
I mean, January's not quite half over yet, right?

It has been super crazy nuts around here the last few weeks.
So, without further ado,
allow me to present to you the top 10 from 2014!!!

I know, I know...
you're thinking...didn't I only post ten times last year?
No...I actually did a few more than that!
:)


As always, I feel these numbers would be totally
different if posted at different times of the year.


9. Taking you into the clouds in my Valentine's "heart-air" balloon.


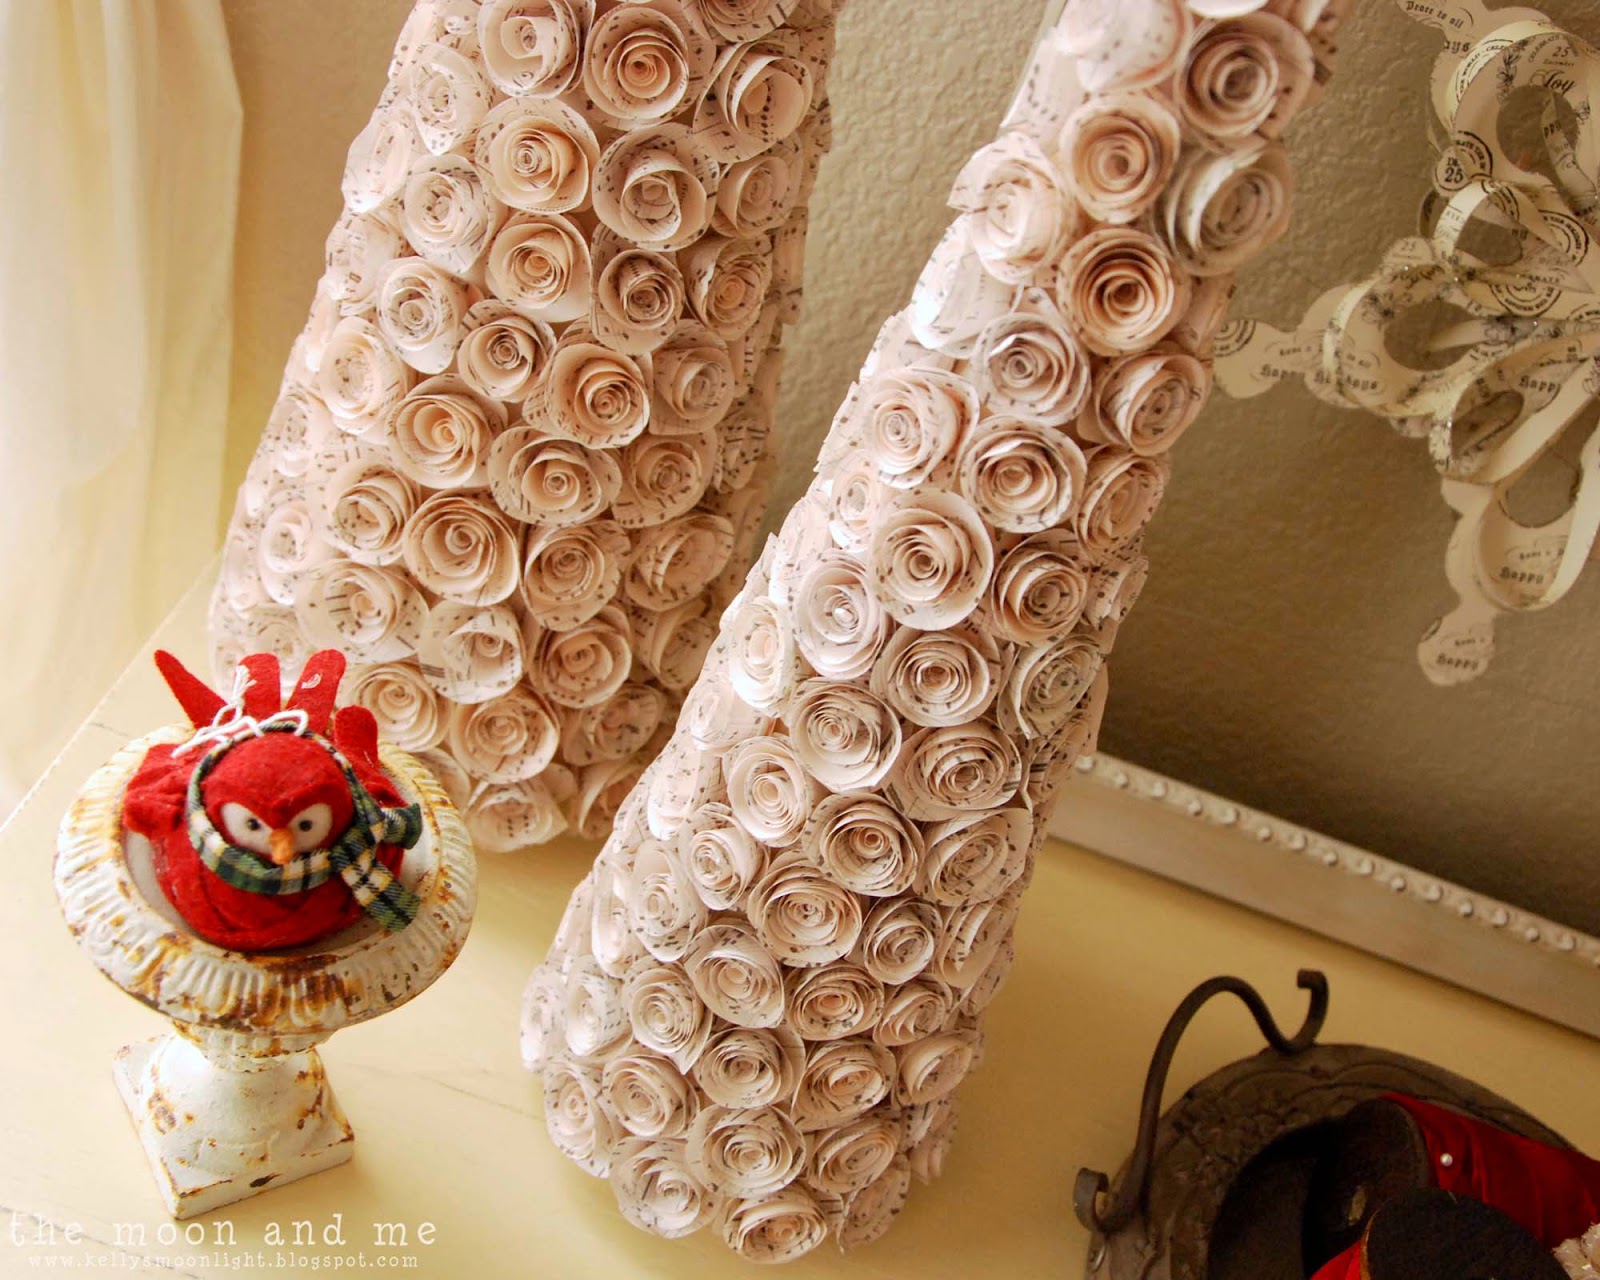
8. Absolutely wonderful and totally time consuming Paper Rose Trees.


7.  The "I still love going in there just to look" Planked wall bathroom.


6. The "keep calm and eat breakfast" Cheesy Egg and Sausage Bake.


5. "I can't believe I ate all the frosting" GF Chocolate Cupcakes with Peanut Butter Frosting.


4. The secret makeover of Sara's purple palace.


3. The Chalk Painted Dresser of my dreams.


2. The great TV Console maker
and the single most popular post from last year...


The super easy customizable DIY personalized cutting board.

And there you have it!
I had lots of fun in 2014 doing all these projects...
I hope you enjoyed them, too!

2015 looks to be challenging for my blogging time.
I just changed jobs and have much less free time now...
although I am totally stoked for this new adventure in the new year.

I know I promised a sweet treat before Christmas...
I am hoping to get it out to you in time for Valentine's day.

Until then, keep smiling!


Sharing here:

Craft Dictator
AKA Design
Crafts a la Mode
I Heart Naptime
The 36th Avenue
Reasons to Skip the Housework
I Should Be Mopping The Floor
The Chicken Chick

Tuesday, November 18, 2014

Bake Yourself Silly Gift Basket DIY


Dashing through the dough,
with a broken spatula...
O'er the pies we go,
noshing all the way...

And so it has begun...
the season of eating baking, right?


Today I have a great gift idea for you,
and it's pretty simple to put together.
Perfect for the bakers in your life.
The Bake Yourself Silly gift basket.


Start with a nice glass batter bowl.
This one is from Anchor Hocking and I
picked it up at Wally World for about $8.
I like the shape of it, it has a lid and can be used in the oven.


Find a cute kitchen towel or two, HomeGoods is your friend.
I included some easy Betty Crocker mix packets...
peanut butter cookies, oatmeal chocolate chip, and some blueberry muffins.


I also made up a  DIY gift sack with the dry
ingredients from my favorite pumpkin bread.
Don't forget to add a can of pumpkin.


Add a stack of muffin papers...it was close to Halloween
when I made these, that explains the candy corn.
Throw in some hand stamped bamboo spoons for little extra personalization.


Put a little tissue filler in the bottom of your bowl, 
arrange all items for the best fit and presentation.
Find a fabulous gift basket bag wrap thingamabob big enough
to fit all your goodies, tie it with a cute tag and some twine...


And you're ready to give an awesome
afternoon of baking to someone you love.

You can download and print the tags here.


You can customize this for any occasion...
just think...sprinkles, cupcake decorating tools,
cookies cutters...make it your own.


I recently made these two fun baskets as door prizes
for a chili cookoff my mom and I organized.
They were a big hit.

I've been trying to get this post up for some time.
It's just been crazy around here.
We've had some wild family stuff going on since summer
and I, for one, am ready for it to calm down.
Can you believe Thanksgiving is next week?

I've got several fun holiday themed projects waiting to be shared.
And, by George, I am going to do my best to get them out to you!
I hope all you lovelies have a wonderful
week and a blessed Thanksgiving!


Re-gifting here: