Monday, July 30, 2012

Dutch Baby Pancake ~ together we will change the world!

6 ingredients.
SIX.

Easy?
Yep.

or Saturday

or that odd Thursday when no one has school or work
you know...whenever


You'll be a hero.  Heroine. A super mom.
Your family will stagger from their beds, hair standing on end, mumbling,
"Wow, what is that fabulous smell?"


The planets will align.
The dog and cat won't fight.
But NO mass hysteria, I promise.


And for a brief, shining moment, the whole world will be right.


Because this is the stuff pancake dreams are made of.


 One bite and you may just hear the hallelujah chorus being sung by fat cheeked cherubs.


Euphoria on the end of a fork.


But don't take my word for it, don your supermom cape and give it a whirl.
Your family will thank you.


And possibly build a statue in your honor.
Fuzzy slippers and bathrobe optional.


Dutch Baby Pancake Mix
·         1 cup flour
·         1 tsp. cinnamon
·         1/4 cup sugar
·         1 cup milk
·         4 eggs
·         1/3 cup butter


Place butter in a 9” cast iron skillet or round baking dish. Set in a 425° oven until the butter melts.
Mix the dry ingredients together in a small bowl.
Whisk together milk and eggs.  Stir in dry mix and blend well.
Remove skillet from oven and pour in the batter.
Bake at 425° for 20 – 25 minute or until puffed and golden.
It will deflate a little when it cools.  Top with maple syrup or powdered sugar.  Both totally optional.
adapted from Gooseberry Patch Merry Mixes

Just a note...

If you use a breakable baking dish, you must be careful not to thermoshock it.
I suggest pouring just a little of the pancake batter in and
swirl it around before pouring in the remainder.

Also, in the pictures, I used an 8 inch deep dish pie stone...
so it was a little dense, but still delectable!

Let me know if you give it a try...and if you love it as much as we do.
I'd even like to see your supermom cape! :)
©Kelly


Saving the world~one breakfast at a time...
HERE:

Friday, July 27, 2012

Loads of Laundry ~ A Makeover Story

Yes! The long-awaited day has arrived!
The day I reveal the laundry room!!!
I know, I know...you thought I was bluffing.

Now, hopefully you won't get so excited that you make a puddle on my
cute little rug I got on clearance at Hobby Lobby.

I'm going to start by apologizing for some not so great pictures.
Our laundry "room" is more of a tiny pass-through between the hallway
and the garage.  There are NO windows and NO natural light makes its
way into this room at all.  Part of the reason for the dark and sadness.
And due to the tight quarters, even my wide angle lens couldn't get the whole shot
with me smashed up against the hallway wall.  So I had to resort to some phone pics.

To save you from having to look at all the scary before pictures one at a time,
I have conveniently put them into a collage.  Nice of me, huh?

Oh, maybe I should also apologize for the scary mess that WAS my laundry room.


Because of its location, it was a dumping ground for stuff that
might eventually make its way to the garage.
(an empty flower pot, some chamois, the dremel)
My dryer is OOOOOOLD but still works great so I have no real
reason to replace it. But it's beat up and the color didn't match the washer.


I fixed the "dirty clothes everywhere" with a fabulous laundry sorter.
And, YES, everyone uses it.  It's AWESOME!

There was just this one shelf which was just so disorganized and messy.


Once the sorter moved in, I knew I was ready to make the rest of the changes.

A few months back last fall they did some update to our office area.
They replaced some ugly cabinets with some pretty, new ones.
Since they were throwing them out, I asked if I might have one.
Yes! Score!  I knew we could use it for the laundry room.

I didn't get a picture of mine, even though it sat in the basement for MONTHS.
So I just snapped a pic of some of the same cabinets in HR.
Mine is only a 2 door.


Quite the beauties, huh?


Here's what it looks like with some 1/4 inch lathe attached to the front of the
doors (with powergrab) to frame it out.  I painted the inside a beautiful aqua.
I wanted it to be fun when you opened it.  My husband said,
"Fun? This is bordering on ready for the loony bin!"
What does he know?
I picked up the red polka dot knobs from Hobby Lobby.


After that, we built in the shelves and finished them off with moulding on the front.
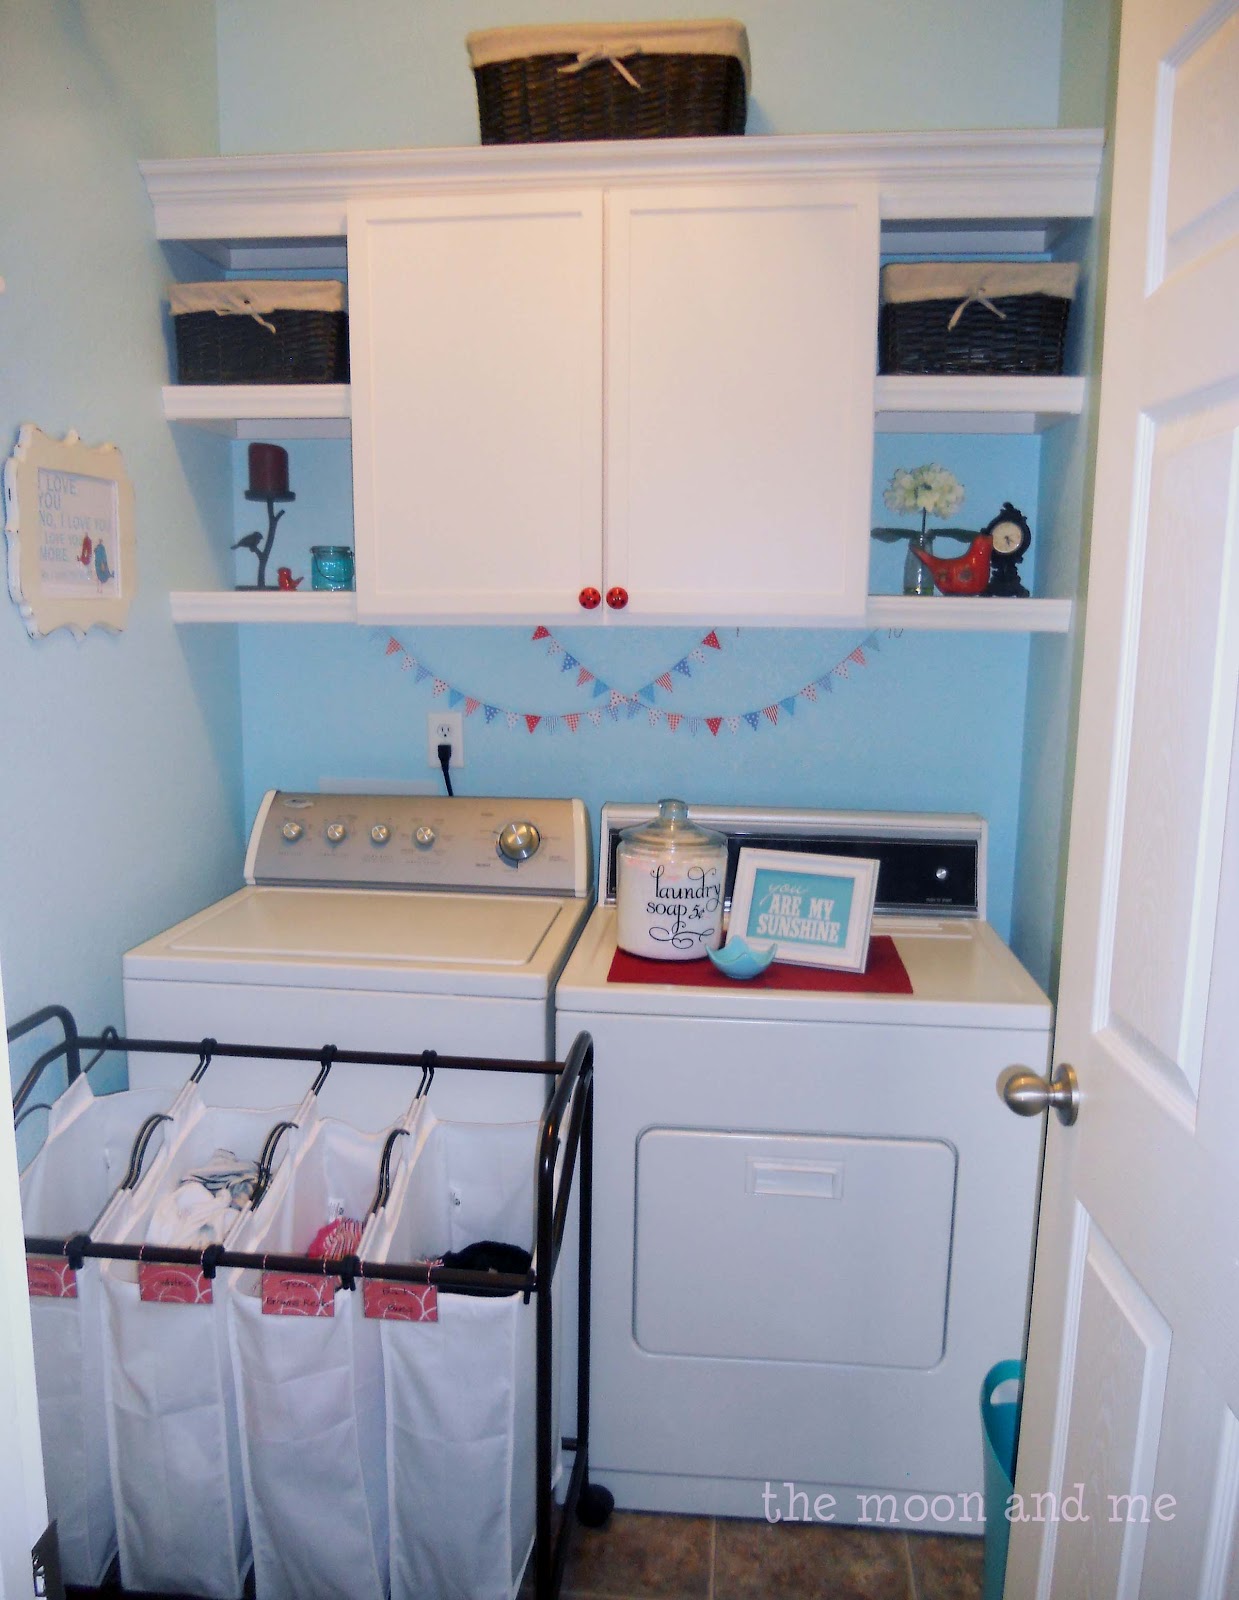
I added crown to the top and I am in love with it.

We spray painted, YES, spray painted the washer and dryer to match!


The walls are Glidden's Aqua Mist.
I tried about 6 sample pots of color before I found the one that made the angels sing.
The cabinets and trim are SW Creamy (Behr color matched).


I went with birds as a minor theme.  It all started with this cute
printable I found here and I just changed the little bird's color in photoshop.
Then I found the candle holder at the thrift store for about $2 and I knew it was meant to be.


Kismet.
Because then I found this adorable red ceramic birdie below on clearance at HobLob.
So I "borrowed" the red glass one above from my daughter.  :)


I picked up the baskets at Michael's on sale.
You can see the iron peeking out of the right one.


The sunshine printable came from the same place as the birdies.


We found an over-the-door hanger for the ironing board...so it's out of the way.
And a cute "skinny" turquoise trash can. LOOOVE!


Here's the little rug I asked you not to piddle on.


This is the canvas I showed you in this post.


This teeny print I made after seeing a similar one online somewhere.


Would you believe...the frames below came from Hobby Lobby?
$20 reg price for the 8X10...of course I used a coupon...
I also painted over the black and distressed it for the look I wanted.
But...how cool are they?


I found this image of fabric online and loved it...so it became art.


I have a cutter, but ordered this from Empressive Designs on Etsy because it was easier. :)


I sometimes just turn the light on and gaze upon its cuteness.
My husband was not exactly all in when we started this project...
but he really likes the "after" almost as much as I do.


The B & A:


Updated: I had a lightbulb moment...used my daughter's camera.  It's a little better.


Here she is in all her glory:


It really works so much better for us this way.
Much more user friendly!
What do you think?
Have you redone your laundry room?
Do you love it?


©Kelly

Linking up here:
My Uncommon Slice of SuburbiaI Heart Nap Time TDC Before and After
I'm a Fan of My 1929 Charmer Blog!Ivy and Elephants


Beneath My Heart July Best DIY
Days of Chalk and Chocolate
DebbieDoo's Newbie Party

Saturday, July 14, 2012

Summer Feet

We're heading out for a break...not that you'd notice much with my
sporadic posting, huh?  I am working on the laundry post and a couple others.
They should be up right after we get back.

I wanted to leave you with a picture that reminds me of summer.
I called this session "4 fabulous 5th graders." These girls were loads of fun!


Hope your feet are having fun this summer!

Saturday, July 7, 2012

Pomp and Circumstance

Good morning, everyone!
Looks like I'm getting behind again.
I am still editing the laundry pictures. It seems I have very limited time right now.
Ugh...and the heat has been ridiculous.

But, I wanted to share some pictures from my daughter's graduation.
We hosted an art gallery showing for the party. She has been
taking multiple art and fashion classes for years so we thought
a showing might be fun.

The students got to pick their own group of 4 to sit with...so
they all got to spend the ceremony with friends and receive
their diplomas right next to friends.

It was soooo muggy and misty that morning.  All the bleacher seats were wet...glad we
remembered to take some towels.  See what nice things that does to curly hair?
Here is Sara and her best friend, Taylor.


Now it's time to party. 

My husband built this custom bi-fold display. It's pretty cool actually.
He framed out two big pieces of peg board by making
channels in some 2x2s and using wood glue to attach them.
He screwed the corners together for support and added
hinges so we could stand it and it would support itself.
Sweet.
The masks we tied in place with fishing line.
The other artworks we used pegboard hooks and they worked beautifully.

And we can re-use the pegboard in the garage. 
She displayed some of her awards also.  Some academic and trophies from dance.

She was able to borrow several easels from the school to use for other pieces.


Ignore that poor little top cake.  It was HOT and wanted to melt. :)

I forgot to take pictures of the whole cupcake stand when it was full. Obviously.


The dress that went from idea, to painting, to reality.


Here are "the girls."  5 life size paper dolls she did for a series combining fashion
and art.  They were placed around the house but difficult to photograph.
The last one is not paper.  It's a mock-up of the purple dress above.

A friend from class posed for the cutouts.  Sara traced her on cardboard then
we cut them all out. My husband made supports for all of them to stand,
and we spray painted them. They even have some styrofoam boobs and waists
so they have some shape.  Before they were "dressed" I placed them in front
of the living room windows. It looked hilarious at night. :)

I hope you enjoyed this little party tour as much as we enjoyed hosting it.
Sorry, we're out of champagne and hors d'oeuvres.
But at least you didn't have to wear the black tie.

If you have questions about any of the artwork you see, please feel free to ask.

Have a great weekend!