Showing posts with label cake. Show all posts

Saturday, April 12, 2014

How To Make A Fondant Bunny

I don't do a lot of "decorating" for Easter...
so I didn't figure I had anything fun to share...

Then myself reminded me that I had made a little Easter cake
a couple of years ago with one of these cuties on it:


Myself has a bad habit of remembering things at the very last minute...
so that is why you are getting this little tutorial
ONE WEEK before EASTER!
So sorry. :)


Most cakers use gum paste for figures...
if you want them rock hard faster, do that.
I just use fondant because I'm impatient and don't like messing with gum paste.

Satin Ice is my favorite...especially if you plan
to use it on cake and actually EAT it.
(this White Buttercream flavor is new and pretty good)


Get yourself a nice sized glob of fondant...
and cover the rest up...it dries out quickly.


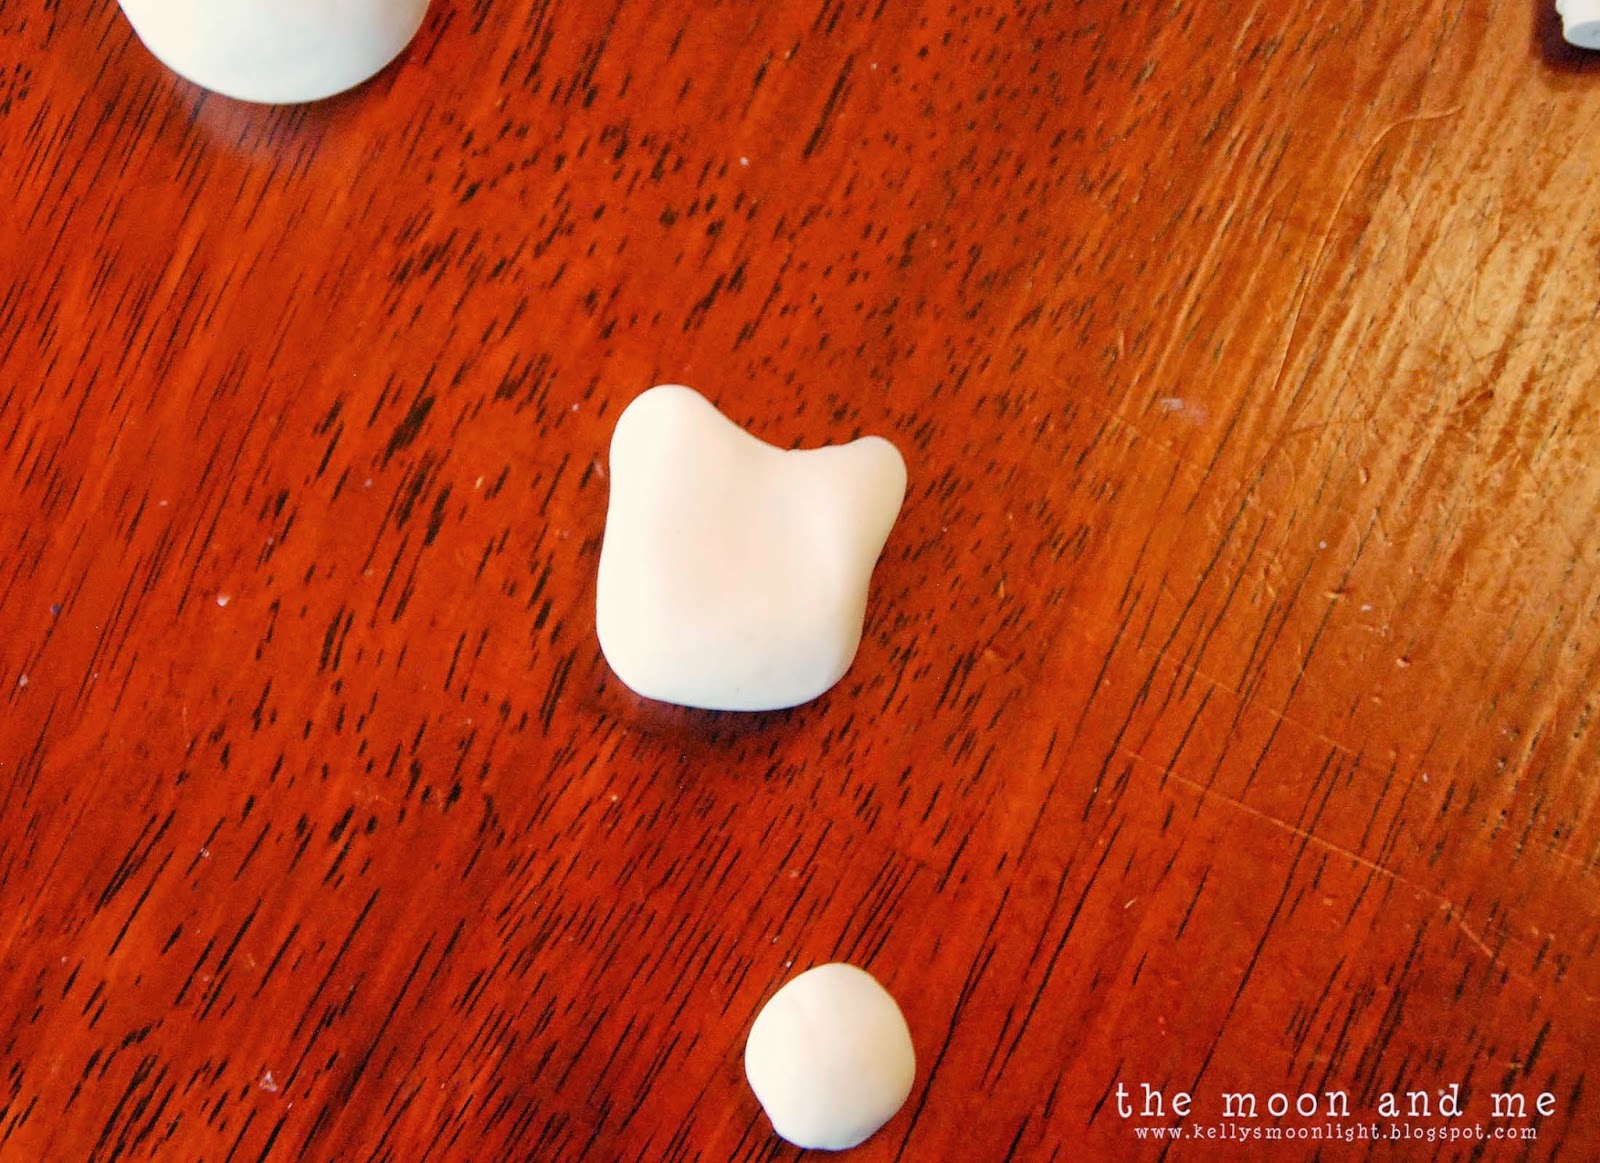
Divide your fondant into 3 sections about this big.
I actually had a little too much and ended up with a chubby bunny.

Side note: did you ever play that game in youth group where
you had to stuff your mouth with as many marshmallows as
you possibly could and then say "chubby bunnies" several times?

***insert crickets chirping***

NO?

Welllllllll........me neither then, I was just checking.

Anyway...
Take your middle sized ball and start to pinch one side to shape the ears...


Just keep working it and smoothing it until you get the length you want.


Next start to shape the rest of the head...mine has fat cheeks...


and from the side you can see I tried to make the
bottom of his face elongated like a bunny's.

Shape your largest ball into a sort of bunny body.
Adjust size if necessary.


from your smallest ball take a couple equal pieces and shape the feet


Make the side that goes under the body flat and dab with a little
water on the end of your finger to stick them to the bottom of the body.
Use a tooth pick or the edge of a knife to make some bunny "toes."


Take two more small equal pieces and roll into arms.
Flatten the top edges and attach to top of body portion using a dab of water again.
These should be placed so that they're under the head once it's on.


Now to finish the face.
You should have a little piece left...
from that make two small flat, round pieces...cheeks
one very small long round piece...nose
and a small rectangular piece with a dent in the middle for the teeth.


Petal dust (top) is great for coloring fondant, but not always readily found.
You can get it at cake and candy supply stores and some kitchen stores.
However, pearl dust (the long tubes), is made by
Wilton and can be found at Hobby Lobby.
  
Attach the face pieces in this order...
Teeth
Cheeks
Nose

Using a clean paint brush, I applied the petal dust and made my nose dark,
and used a little less to make my cheeks rosy.
You can do the same with the pearl dust, it may just be lighter.
(I used the white pearl dust over the WHOLE bunny once he was done)


Using the other end of the paint brush, make two small dents for eyes...


Can you see them there?
If not, no big deal...


Use an edible food marker to fill in the eyes...
these have a nice wide pointed tip, so you could even
JUST use the marker to make the dents.


Now...comes the waiting.
As you can see, my bunny is sitting on a piece of parchment...
That is so he doesn't stick to the table.
You could also use wax paper or the shiny side of freezer paper.

Shape your bunny ears how you will want them to be when they harden.
One up, one down...both floppy, whatever.
But he needs to set up and harden AT LEAST
overnight for his ears to stay standing.

Once the fondant has hardened, place the head on the body,
you can use a little water dabbed again, to make the
body and bottom of the head sticky and attach.
(you can use a toothpick for more stability...make sure you place it
while the fondant is still soft, and make the hole in the body also.
 Then allow to dry inserted into the head.)


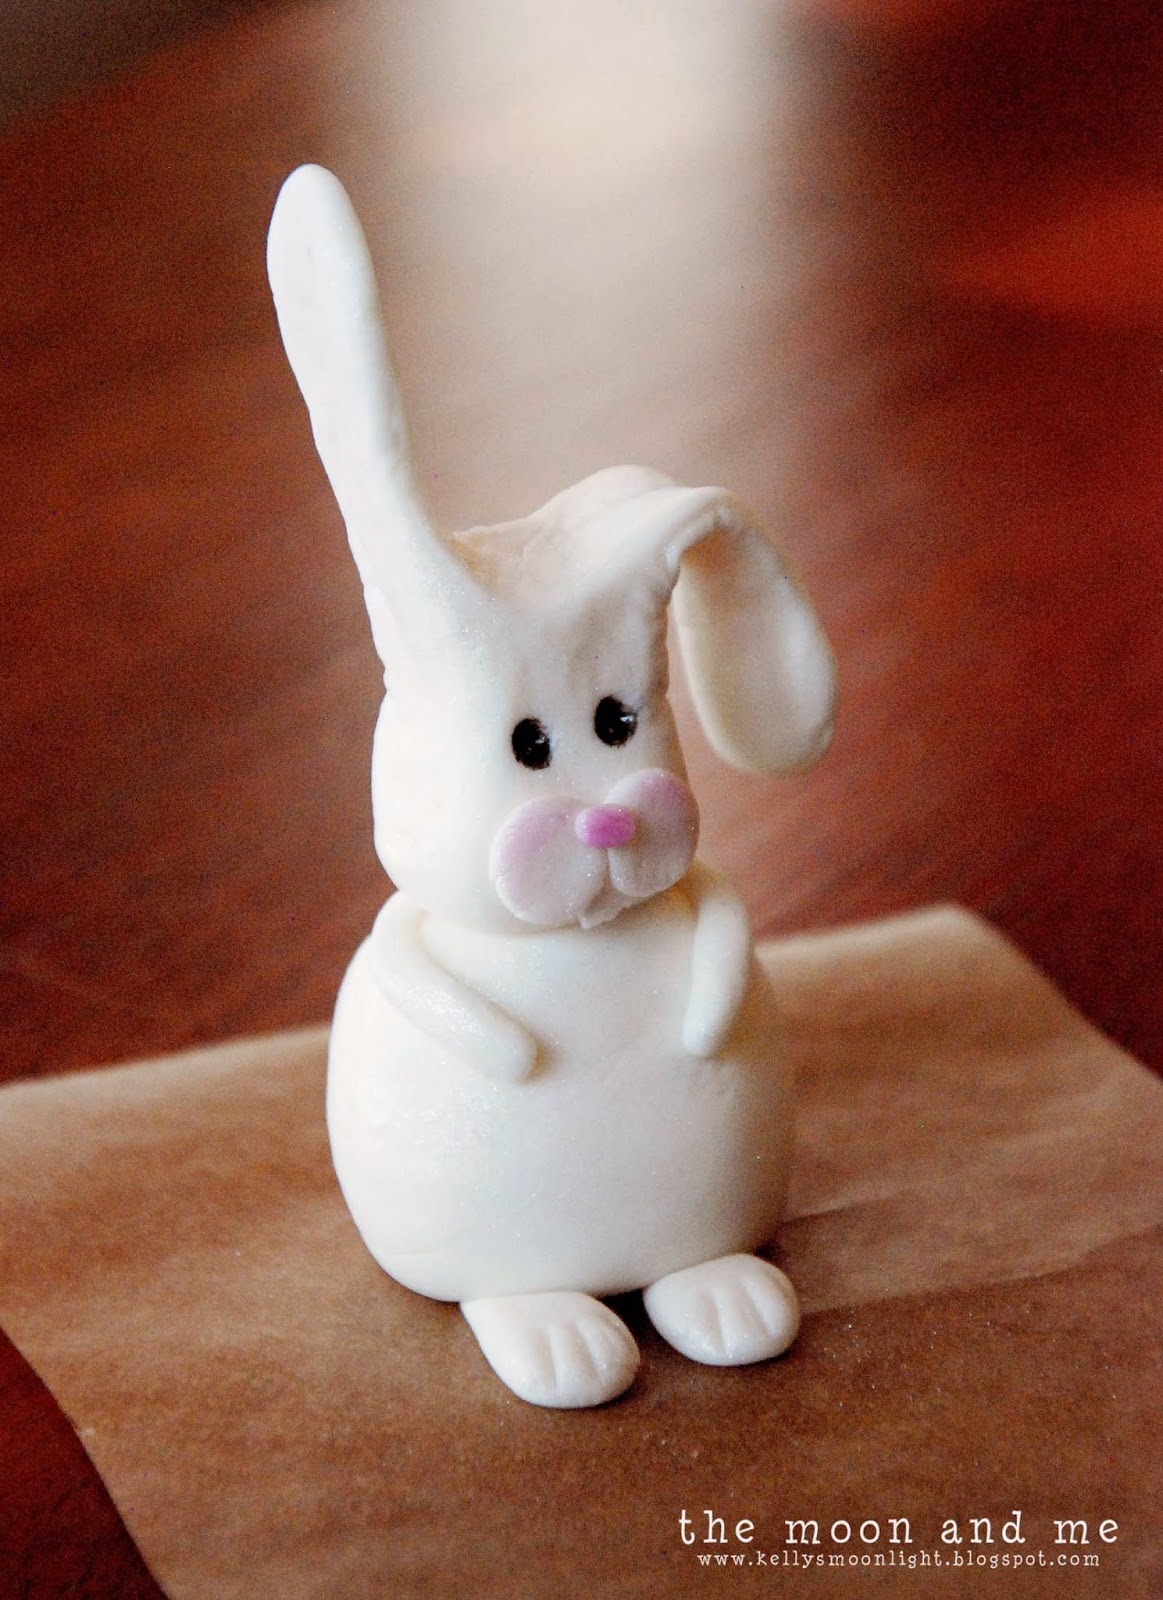
Look at that face!!!!
Now you have an adorable little bunny
to put on top of your Easter cake.
Well, I guess that is if you MADE an Easter cake.


 Little Bunny Foo Foo
hopping through the forest...

...scooping up the field mice
and boppin' 'em on the head...


OOOPS...
Wrong bunny...


Don't you just wanna pinch his cheeks?

Here is my original bunny sitting on his little cake.
I went to find him (I still have him) in his box,
and his ears had broken off! (The old one, not the new)
It was very sad. :(


The "eggs" are colored fondant, so are the rolled flowers.
And the grass was easy...just use the grass tip with some green buttercream.


Ta DA!

Doesn't he just make you smile?
He does me!

 I know this is last minute, but I hope I've inspired you to
make your own little bunny for your Easter dessert this year.
Let me know if you give it a try...
and if you have any questions.

Have an awesome weekend!


Hopping along to these parties:

Thursday, February 20, 2014

Gluten Free Chocolate Cupcakes with Peanut Butter Frosting

Howdy, howdy!
I told you I had sweet treats in store for you!

Remember once I told you I had a friend with gluten issues?
Well, it was his birthday recently...
and we were headed to their house for Bible study...
and I couldn't very well show up empty handed, now could I?

So...I took some of these babies...and we all chowed down!


They're dark and moist.
Chocolatey and peanut buttery and oh so utterly...
good.


Actually, if you want to know the real truth...
while the cupcakes were pretty good...
I threatened to lick the frosting off of every last one...


Seriously...it was THAT good!
Oh my...I could eat it all day long with a spoon!
Or at least until I made myself sick.


It was the first time I'd made a peanut butter buttercream
and I can tell you...it certainly won't be the last!
The cupcakes were good, but the frosting makes all the difference!


Gluten Free Chocolate Cupcakes
  • 1 1/2 cups GF All Purpose Baking Flour {from Bob's Red Mill}
  • 2 tbsp corn starch
  • 1 cup brown sugar
  • 1/2 cup white sugar
  • 1/2 cup PLUS 2 tsp unsweetened cocoa powder
  • 1 tbsp baking powder
  • 1 tsp xanthan gum
  • 3/4 tsp sea salt
  • 1/3 cup butter, softened at room temp.
  • 1/4 cup vegetable oil
  • 1 large egg
  • 1 tsp pure vanilla
  • 1 cup warm brewed coffee
  • 1 tsp cider vinegar
  • 1/2 cup mini chocolate chips
  1. Preheat oven to 325°F. Place cupcake liners into muffin tins...you'll need 24.
  2. Mix all dry ingredients together in a large bowl. 
  3. Add butter, oil, egg, and vanilla. Mix until the batter has a crumbly texture.
  4.  Slowly add coffee and vinegar.  Beat at medium speed for 2 minutes.
  5. Fold in chocolate chips.
  6. Fill cupcake liners about 1/2 to 2/3 full...you really should get 24. :)
  7. Bake for about 20 minutes...until they spring back when gently touched.
  8. Remove from oven and cool completely on a rack
{This is basically the recipe from Bob's...
I added the chocolate chips because...well, why not?
And I adjusted the temp and baking time for cupcakes.}


Peanut Butter Buttercream Frosting
  • 1 cup {2 sticks} butter, softened at room temp.
  • 1 cup creamy peanut butter
  • 1 tsp pure vanilla
  • 3-4 cups powdered sugar
  1. Cream butter until smooth.  Add vanilla and peanut butter and beat until creamy.
  2. Add 2 cups of powdered sugar, then gradually add more until you reach your desired consistency.
If you want to be able to pipe it, make sure it's firm enough to hold up. 
Use a large open star tip and swirl it on.
Sprinkle some extra mini chocolate chips on top for extra goodness.


My friend was thrilled!
He doesn't get home made GF goodies very often.
I think he may have swooned a little. :)

I took the extras to work and everyone loved them there, too!
{especially the frosting...hee hee}

We've gotten a little reprieve from winter around here for a few days.
It's been sooooo nice!
I hope the same is true for you guys
and that you have a fantastic weekend!

Very soon, I hope to be able to show you what
we did to our old TV entertainment center.
You wouldn't even  recognize it!
Until then...


Handing out spoons {for frosting!} here:

Tuesday, December 10, 2013

Have Your Cake and Christmas, Too!


Did you ever see the movie Babe? 

You know...the one about the pig who herds sheep?

NO?!?!
Well...there's this duck...named Ferdinand...
who finds out a good friend of his
just became Christmas dinner.

Horrifying, I know.

Well, actually it's really funny...

but he flies off squawking
"Christmas means carnage!! "Christmas means carnage!!"

Well, I'm starting to feel like MY goose is cooked!
I've been too busy to finish up some Christmas projects I wanted to show you...
guess they'll keep till next time.
So, I thought I'd share some confectionery inspiration
in case you needed some for all those Christmas parties:
  

Above:
The Santa hat is cake cut to a cone shape
then iced and covered in fondant.
I used a star tip to make the "fur".
The snowflakes are fondant cut with cookie cutters and left to harden.


Same technique here for the "fur" and snowflakes.
The gold buckle was edible dust mixed
with vanilla extract and painted on.

Everything was sprayed with edible pearl spray.


Cupcakes are super easy...and super portable.

These were chocolate with peppermint buttercream.


The presents and the Santa hat were made with fondant.
I've seen people shape toppers out of taffy and other
soft candies when they didn't want to mess with fondant.
There are lots of options.

My crazy busy time is almost done...then I can
relax and enjoy the rest of the season.
Oh boy I can't wait.

Come back in a couple days...I'll be sharing some
yummy tarts and Christmas traditions.
I may even throw in a house tour or two!

Are you almost done with your shopping and gift making?
Not me...but I've got it all planned out!
Have a sweet week!

...and don't forget the secret code:

Baa...Ram...Ewe!!


Whipping up frosting here:


Tuesday, June 18, 2013

Caramel Mocha Mini Bundt Cakes


Or maybe a better title would be:
My Misadventures In Baking

Seriously.

I started out to make this cake from Inside BruCrew Life...
for Father's Day and ran in to trouble right from the start.

Well, I guess the trouble didn't start right away.
Like, I KNEW I didn't have plain yogurt.
No biggie.

  
I used sour cream.
I make all my cakes with sour cream so I
wasn't the least bit worried about this part.
{if you click that link you can see most of my cakes}

I used vanilla pudding instead of chocolate because that's
what I had and didn't want to make a special trip.
You know how it is.

All was well and good.
Or so I thought.

I went to the baker's rack to get my fluted stoneware pan...
it was cracked.
Big crack.  How the heck did that get there?
{insert BIG sad face here}

At least they still make them...
SO...I had to do the next best thing...
use the mini fluted stoneware pan that's
been gathering dust in the cupboard.


Moving on...
Everything seemed to be going smoothly,
until it was time to add the oil.

Where did it go? Is it hiding?
I could have sworn I saw a bottle in the cabinet the other day.
Either that or the pancake syrup was playing tricks on me.

We mainly cook with olive oil and I didn't want to use that.
So I substituted melted butter.

I couldn't get my white chocolate to
melt properly...it kept getting lumpy.

Oh.My.Goodness.

But, just so you know...
it turned out DELICIOUS!!!!!


So, here are the adaptions I made to the original recipe:

Ingredients:

  • 1 chocolate cake mix (I use Betty Crocker's Triple Chocolate Fudge ~ THEEEE Best!!!)
  • 1 instant chocolate {or vanilla} pudding mix (or whatever flavor you want)
  • 1 cup sour cream
  • 4 eggs
  • 1 stick butter, mostly melted
  • 1 cup brewed coffee, cooled
  • 1 cup mini chocolate chips (optional if you use the above cake mix)


I interrupt this regularly scheduled blog post for a sweet tooth service announcement:


See this naked can?
Did you know it's super easy to make caramel sauce?


Grab a can of sweetened condensed milk
{I'm a snob and only buy Eagle brand}
Remove the label...place can in pot of hot water, enough to cover it,
bring to a boil and simmer about 2 hours.
Add more water as needed to keep covered.


When the time is up, let it cool...you don't wan't to get burned.
This is what you'll see when you remove the lid.
A whole bunch of gooey caramel awesomeness.

Make several and keep them in the cupboard...
ready when you need it.
{P.S. it is unbelievable with apple slices!}

You're welcome.


Topping: 
  • 1/2 cup milk chocolate chips
  • 1/2 teaspoon shortening
  • 1/2 cup caramel {you can warm it in the microwave a little so it's drizzly}
  • coarse sea salt, optional


Instructions
  1. In a mixing bowl, combine the cake mix, pudding mix, sour cream, eggs, butter, and cooled coffee. Beat on low for 1 minute, scrape sides then beat 2 minutes on medium. Stir in the chocolate chips.
  2. Since I had a mini fluted stone, I used that (with some batter to spare in cupcake wrappers), but you could also pour into a greased 10" bundt pan.
  3. Bake the minis at 350° for 40-45 minutes or the full size for 50-55 minutes. Let cool 15 minutes in the pan. Place a plate over the top of the cake and flip the cake over. Let cool completely...or not.
  4. Melt the chocolate chips and shortening in the microwave. Heat for 30 seconds. Stir until creamy. Place in a plastic baggie and cut one tip off. Drizzle over the top of the cake. {awesome tip} 
  5. Warm the caramel in the microwave until thin enough to pour...about 30 seconds. Drizzle the caramel over the chocolate. Sprinkle the top with the sea salt if desired. Store in a sealed container.

 I still want to make Jocelyn's version because it looks soooo fudgy.

Tuesday, April 30, 2013

Simple Sweets for Teacher Appreciation

An awesome teacher can make ALL the
difference in a child's school experience.
I know that all too well.

When Sara was in first grade...the teacher said she was
a daydreamer and if she didn't learn to focus
she'd never be successful in school.
In first grade, people!

Really?
Did she know my kid?
My kid was smart...she was special. 
  

 I know, as parents, we all believe
our children to be special.

Because they are.

We don't want anyone to tell us differently.
But we're talking about a child who, from the age of three,
would go somewhere {a friend's home, church, public places}
and start rearranging items by size and color
because she was compelled to organize them.


My problem with this teacher was not that
she said this, but that she ONLY said this.
She didn't offer solutions or suggestions.
Thankfully, the school year was almost over.

In second grade, she met Ms. Chacon...the world's best teacher.

She looked at Sara and said...this child is bored...
she's not a daydreamer...
she just needs more work to do
and something to challenge her.
And that realization changed everything.


I'm not saying this teacher was a bad teacher...
I'm not sure how I feel about that.

What I do know...
teachers have a tough job and
sometimes they're just wrong.

They need all the support they can get
and a little appreciation goes a long way.


I've seen all the cute printable and fun teacher
gift ideas floating around the interwebs.

I love them all...but I never really had the time for that.

I believe a simple sweet gesture says Thank You
just as much...and they get to eat it.

Here I've included what we've done the last few years.


At the top were Pink Velvet cupcakes with cream cheese frosting.
Sorry...I don't know if that's the actual recipe I used.
I used a small flower cutter on some rolled fondant and wrote
Thank You with an edible food color marker.

Did you catch that perfect packaging for portable cake?
Drop your cupcakes into a plastic punch cup...
wrap in a cellophane bag...tie a fork on with a ribbon.

Voila!  Cake to go!


One year we just did decorated cookies...
individually wrapped and tied.

Those are No Fail Sugar Cookies with some buttercream {with real vanilla}
and fondant rolled and cut with the same shape cutters.
Yes, these took some time...but I also made some cookie
bouquets for Mother's Day at the same time.

These cookies are great at keeping their shape.
And they're yummy, too.
More buttery than sugar cookies usually are...
which is a good thing in my book!


Then more cupcakes...in school colors...
with some awesome edible gold star glitter.
I didn't add the forks this time.
These were just triple chocolate fudge.
YUM!

So, even if you don't have time to make a bunch of
super cute supermom individual teacher gifts...
don't forget to say Thank You to the teachers
and principals in your child's life.

Cookies (even simple chocolate chip),
cupcakes, a handwritten note...
Heck...I can think of 5 blogs off the top of
my head that have some cute printables!
:)

See you next time!


Sharing here: