Pages

Monday, December 31, 2012

Highlights for 2012

I hope you all had a fabulous Christmas
and are anxiously awaiting the fresh start of a
brand spankin' new year!

I don't have any New Year's Projects for you,
however, I'll let you see how we celebrated last year...
but first,
I mustache you a question...


Do you like to party?


We had a lot of fun last new year's eve with some
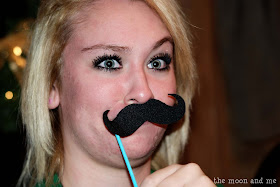
mustache and word bubble props.


Of course, Sara picked the
"this is what AWESOME looks like"
bubble.


My friend, Kristian with her Fu Manchu...


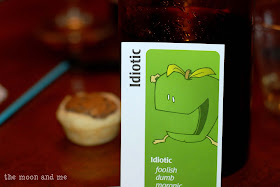
We played Apples to Apples...
I ended up with this card and thought it was kind of fitting:


Looks like a group mug shot...


My sister:


Sara and my mom...my mom still has her mustache.
She keeps it in the kitchen...I think she wears it when no one is around. :)


Kristian's husband, Waylon...
we used to tease him that he needed to be medicated just to hang out with us.
I'm not sure it was a joke. :)


Taylor looks good with a stache!


Even the kitties got involved...willing or not...


Goofy-ness...

There are tons of mustache templates online.
I used some to cut stiff felt and hot glued them
to some mini dowels I painted.
They were nice and sturdy and will last a while.


The word bubbles I just made in Word using this method.
They were printed on cardstock then cut out and glued to the dowels.
I got a whole pack of them at Hobby Lobby cheap.
 You could use skewers, but they're pokey and I'm clumsy. :)

Have a supercalifragalisticexpialidocious New Year!!!


Now, on to the highlights...
I wasn't sure if I was gonna do a recap post...but decided...what the heck.
Here goes...
the most popular posts for 2012:

Number 1...the Folding Chair Facelift!
This post has gotten over 50 thousand views...and
continues to be the highest viewed post daily.
I was contacted about using it for a project for troubled teens.
I can't believe painting my chairs would have garnered so much interest.


Even got a virtual high-five from the blogger I copied. :)


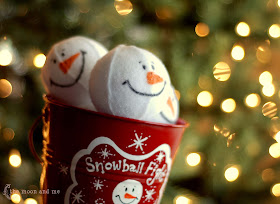
3. Snowball Fight in a Bucket make your own fun!


4. My Witch hat tutorial for fashion forward witches!


It surprises me that this one made the top 5 :)


How are you celebrating?
We stay in and play games and act silly...
there may or may not be brandy slush involved.

Looking forward to an awesome 2013!


sharing here:


Monday, December 24, 2012

Happy Christmas to All!

Wishing you and yours
a Very Merry Christmas...
 
 
And the most wonderful things
in the New Year!


Wednesday, December 19, 2012

Double Chocolate Peppermint Brownies


***NOTE: this post is from Dec. 2012***

Greetings all.
I know it's been a while...December is so busy.

Then horrible things happen and you just don't
have the heart for posting light-hearted things
about decorations or brownies or anything.

But sometimes there is comfort in doing normal things.
For me, that is some therapeutic baking.

So, I cried and I baked a bunch this weekend.


I wanted to share these delectable brownies with you.

I found these Andes Peppermint Crunch
baking chips and KNEW we were gonna be BFFs!

So, put on your apron, and bake your little heart out.


Double Chocolate Peppermint Brownies
·         5 oz {approx. ¾ cup} semi-sweet or dark chocolate morsels
·         5 oz {see previous ingredient J} milk chocolate morsels
·         1/3 cup butter
·         1 ½ cups all-purpose flour
·         ½ tsp baking soda
·         ¼ tsp salt
·         1 cup sugar
·         3 eggs
·         2 tsp pure vanilla
·         6 oz Andes peppermint crunch bits {approx. 1 cup}
·         Additional ½ - ¾ cup mixed chocolate morsels
Preheat oven to 350°.
Melt the 2 – 5 oz portions of chocolate and butter in a small bowl in the microwave {medium power for 1 minute, stir, repeat until smooth}. Set aside to cool. You could also do this on the stove if you prefer. Be careful not to over heat.
In a medium bowl, combine flour, baking soda and salt.  Stir together with a wire whisk and set aside.
In a large mixing bowl, beat sugar, eggs and vanilla.  Add chocolate mixture, mix well. Add flour mixture and mix until combined.
Stir in peppermint bits and remaining chocolate morsels.
Pour into a greased 13X9 pan.  Bake 30-35 minutes until toothpick inserted comes out almost clean.
 

Did you know that using a plastic knife to cut your
brownies will help you cut them more smoothly?
No joke.

I never woulda believed it myself, but, it's true.

I hope you are enjoying your family and lovin' them up right now.
Hold them tight and make as many wonderful memories as you can.

Have a Very Merry Christmas!


 Sharing here:

The 36th Avenue


Thursday, December 6, 2012

3 Hot Drink Mixes for Giving {and Keeping!}


Meet Bob.

Bob and I have been working
our little fingers to the bone!


We've been sewing a new tree skirt, making new stockings...
cutting, folding and gluing paper garlands...
not to mention baking cakes and getting ready for birthday parties...
taking and editing family Christmas pictures...

Oh yeah, and drinking LOTS of Christmas Cappuccino.


Bob wanted me to tell you that he understands...
decorating and shopping and wrapping and baking and smiling all the time
is hard work!

You should never expect to do all that without ample
amounts of sugar and caffeine!
Lucky for you, we are here to help!
Well, okay...only one technically has coffee...
but we've got plenty of sugar!


Christmas Cappuccino
2 1/2 cups chocolate drink mix {Nesquick}
8 cups dry milk
2 cups powdered sugar
1 cup instant coffee granules
8 oz jar powdered french vanilla coffee creamer

{These measurements can easily be halved}

Mix all ingredients together in a large bowl.
Store in an airtight container until ready to drink or gift!
Mix 1/3 cup dry mix with 8 oz. HOT water.
Stir...sip...aaaaaah.


Creamy White Hot Chocolate
    1 1/2 cups dry milk
    1/2 cup powdered french vanilla coffee creamer
    1 cup chopped white chocolate {chips or bar}
    optional couple dashes of cinnamon
Mix it all up...store cool and dry.

Add 1/3 cup mix to 8 oz. BOILING water.
Add some cream or half and half.


The World's Best Cocoa

5 1/3 cups dry milk
2 cups chocolate drink mix {Nesquick}
1/2 cup powdered sugar
1 cup powdered coffee creamer {I like Cremora}

Mix it all up in a really big bowl.
Store in an airtight container.
Or make some and decide you're going to drink
the whole batch by yourself in one afternoon.

Or not.

Stir 1/3 cup dry mix into 8 oz. HOT water.
I always add some cream and top with whipped cream.
The added cream makes it heavenly.
You could do marshmallows.
Be that way.
  

Bob said I didn't tell you about the packaging.
He's starting to bug me.
Maybe it's all the caffeine and sugar...

The little brown bags I get at The Container Store.
Adorable.
They're like 39¢ each! No kidding!

I just added paper tape I found at Michael's...some hand painted tags...
okay, one is paper...excuse me!
And some baker's twine.

You could use rubber stamps and emboss them.

The little cans I found at Target for $1!
They hold about 4 servings each.

I just added some little snowflake-lookin' vinyl.


So, if you're giving...don't forget to include directions.

I have done these for teachers in little single serve zip bags with tags.
Great to stick in a larger gift or stockings.


Sorry, Diana...I don't know how to make these without sugar.
If anyone is interested...I do have a recipe for Merry Mochaccino
that uses regular cocoa powder and sugar which could
be substituted with stevia or splenda.
I just haven't made it...everything else in the book has been good, so...

I am still getting my decorations up...I wasn't kidding about all that work!
:)

Oh well, I won't make the Christmas decorating blog parties this year.
There's always next year!

How about you guys?
Is your house all decked out?
Do you go all out or do you do minimal?
Have a great weekend!


The Christmas Cappuccino recipe is from the
Gooseberry Patch original Merry Mixes book.
I've use MANY mixes from there...all fantastic.


Handing out marshmallows at these fine parties:

Wednesday, November 28, 2012

Snowball Fight in a Bucket!


Ever had the urge to throw a snowball at someone...
say...your sister...
and there was just no snow around to do it?


Or you didn't want the hassle of putting on your snow suit,
bundling up with 3 pairs of socks, boots,
long underwear, your scarf and mittens...
then waddling outside in the cold to MAKE the snowballs?

Never fear!
Now you, too, can have an indoor snowball fight!
No cold, wet, messy snow needed!


Start with some styrofoam balls.
These were $4.77 at HobLob before the coupon ($2.86 after).
Some felt sheets 4/$1...can't beat that!
You'll also need a couple paint pens or some acrylic paint and brushes.
Oh...and some hot glue.

Next you need a pail.  I got this one half off so it was $2.50
but it ended up being WAY too small for this size snowball.
I actually found a larger one in the basement that was nice.
Score!

It would be perfect for the next smaller size.


For this size snowball...I cut the felt into these funky
shapes to fit the ball...about 1 3/4" at the widest spot by 4 3/4" long.
You'll need 6 per snowball.

If you're me, you need extras for when you screw up.


It might sound funny to say: center your first piece on the ball...
but you'll see what I mean...it can be lopsided if you try. :)

Follow suit with the remaining pieces...matching up the edges as you go.
The points will come together like this:


Looks like I need some lotion.

For the faces...I had rubbed on some pink cheeks, but
I think the glitter spray paint made them fade away. :(

However, you could dab on some pink acrylic paint...
I had only used a gel pen.  Trust me...that didn't work.

The eyes and mouth were a fine tipped permanent pen.
I used an orange paint pen for the nose.

You could use paint pens for all of it...
or just paint and a brush...or three.


I finished off the balls with some glitter spray paint.
I tried applying glue and glitter.
Ummmm...that didn't work so well.

But I did NOT use the Krylon Glitter Blast -
I think that might be TOO much and cover the face.


I spray painted the pail...this is the Krylon Cherry Red.
Isn't it happy?


I was going to use vinyl for the front of the pail...
but that didn't work out so well.  It didn't want to stick.

That "frame" you see is vinyl...but it may come off at any moment!


The writing, snowflakes and snowball face are all drawn on with paint pens.
They are awesome.
I love them.
A lot.


The felt gives the styrofoam enough weight
to be thrown across the room...
but not enough to hurt or likely break anything.

Not that I'm advocating horseplay in the house.
But not that I can stop it.
You should see the chaos when a grown man and his
18 year old daughter have a marshmallow gun war.

I hide in the bathroom.


I hope your holiday season has started off smashingly.

I know I promised some hot drink mixes...
they are a-comin' folks...
workin' on the last one.

So...what's YOUR favorite hot drink
at Christmas or any time during the winter?


Sloshing it up at these fun parties:

The Dedicated House
Simply {Kierste}
The 36th Avenue
Savvy Southern Style
My Uncommon Slice of Suburbia
Clean and Scentsible
StoneGable
Jennifer Rizzo
At The Picket Fence
Tatertots and Jello
Serenity You
I Heart Naptime
I Should Be Mopping the Floor
DebbieDoo's
Or So She Says
Averie Lane
Dwellings
Love Grows Wild
Life With the Crust Cut Off
Wonderful at Home
Lamberts Lately
Saving 4 Six
From My Front Porch to Yours
Embracing Change
Living Well Spending Less
A Peek Into My Paradise
The Craft Dictator
Crafts a la Mode
Lil' Luna
WhipperBerry
Cheerios and Lattes
Twelve O Eight
DIY Showoff
Carrie This Home
Put A Bird On It
Horrific Knits
Will Cook For Smiles
Live Love Create
Living Locurto
The Scrap Shoppe
3 Little Greenwoods
Lolly Jane
Huckleberry Love
Sew Can Do
Funky Polkadot Giraffe

This project was inspired by something in a catalog from this site.